You are using an out of date browser. It may not display this or other websites correctly.
You should upgrade or use an alternative browser.
You should upgrade or use an alternative browser.
DIY Spod- Waytekwire
- Thread starter pvanweelden
- Start date
pvanweelden
New member
That is looking great! :thumbup:
Sent from my SM-N900V using WAYALIFE mobile app
Sent from my SM-N900V using WAYALIFE mobile app
darkknight1999
Member
pvanweelden
New member
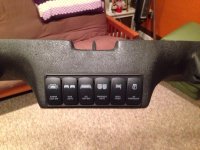
Wow! That turned out awesome! It's gonna look great with the switches!
Sent from my SM-N900V using WAYALIFE mobile app
Sent from my SM-N900V using WAYALIFE mobile app
darkknight1999
Member
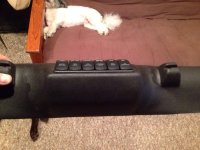
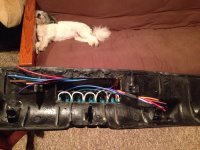
Looks great! Your Dogs neck, not so good.
pvanweelden
New member
Lol ^ 
Man that came out very nice! For those of us that don't do fiberglass work, how long did it take?
Sent from my SM-N900V using WAYALIFE mobile app
Man that came out very nice! For those of us that don't do fiberglass work, how long did it take?
Sent from my SM-N900V using WAYALIFE mobile app
darkknight1999
Member
Looks great! Your Dogs neck, not so good.
I know right…. lol :crazyeyes:
darkknight1999
Member
Lol ^
Man that came out very nice! For those of us that don't do fiberglass work, how long did it take?
Sent from my SM-N900V using WAYALIFE mobile app
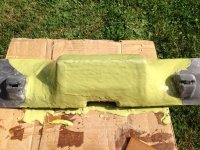
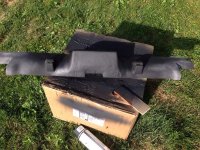
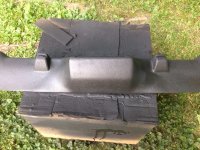
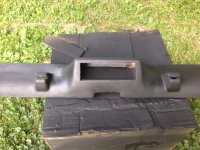
I took the better part of the day, 6-8 hours or so… but I had to do all the sanding by hand. I don't have my air tools here (there all down parents house). I need to buy a smallish air compressor for the house and bring those home. A fair amount of that time is just waiting around for it to dry…
If I had the air sander I bet I could have cut that down by 2 hours.
Having the right material to work with helps. The only thing I had to run out and get was more glue. But honestly unless you have all the material (which I do) it can be fairly costly.
You need to build a wood structure, so some MDF, wrap it with fleece or thicker t-shirt material, Cyanoacrylate glue (Its ultra super glue… makes regular super glue look like Elmers)
Last edited:
ljvsnyder
Member
Nice. I have been trying ti make a panel to fit in the open cubby where the power windows go. Got some aluminum from a fellow jker one here and haven't been able to get anythingvto fit. Any suggestion on how to make a panel out of fiberglass
Sent from my SCH-I545 using WAYALIFE mobile app
Sent from my SCH-I545 using WAYALIFE mobile app
darkknight1999
Member
Nice. I have been trying ti make a panel to fit in the open cubby where the power windows go. Got some aluminum from a fellow jker one here and haven't been able to get anythingvto fit. Any suggestion on how to make a panel out of fiberglass
Sent from my SCH-I545 using WAYALIFE mobile app
How many switches are you trying to install? 2 I'm guessing but that would depend on the type of switches you'll be using.
darkknight1999
Member
5 small round switches.
Sent from my SCH-I545 using WAYALIFE mobile app
Well you should be able to just drill the holes in the plastic and pop them in… if you wanted to use the aluminum, you can cut aluminum to fit the space (Dremel & diamond cut off wheel), once cut and shaped, rivet the AL in place, and mark where the switches would go and drill out the holes.
Sounds like a lot to work but honestly it should only take about an hour or so, assuming you have all the tools.
pvanweelden
New member
There are pictures in this thread where Will (Canvas jk) did his switches in the window switch cubby hole.
Sent from my SM-N900V using WAYALIFE mobile app
Sent from my SM-N900V using WAYALIFE mobile app
darkknight1999
Member
Canvass jk is the one who got me the metal and switches. Really great guy. I just suck at metal fabrication.
If you were closer I'd do it for ya… but you're a little outside my time zone
darkknight1999
Member
I love Boston. Spent nearly four years in Bristol RI. Went up to Boston at least once a month. Thanks for the offer any suggestions on how to do it?
Do you have a Dremel, drill, and eithe the exact right drill bit or a uni-bit (step-bit)?
I would remove the center dash bezel to complete this work.
You just need to cut the aluminum to fit in the space. You could cut it square or you could cut the AL to fit around the vents. You can do that by simply tracing the shape onto a piece of paper and transferring it onto the AL plate.
You can use the Dremel and the sanding drum to shape it... It's pretty easy.
I would rivet the panel onto the dash, or nut and bolt it on, but rivets are better.
Then measure out the locations of the switches and mark it, then drill a pilot hole and then drill out the holes. Remember slowly drill the holes. You can always remove more material, but you can't put it back
Drill one and test fit
Once your done drilling them out, pop the switches in and wire it up.
Sent from my NSA monitoring device... Using the WAYALIFE mobile app
darkknight1999
Member
Thanks had a dremmel and a former neighbor borrowed it. Never saw it again. I am looking to have a more factory appearance with it. If I can't make or get something to work I am going to install them into the a pillar.
That sucks… and my wife wonders why I take a picture of people holding my tools when they borrow them.. lol
I'd give you a hand if you were closer. Is there anyone local that can give you a hand maybe?

