You are using an out of date browser. It may not display this or other websites correctly.
You should upgrade or use an alternative browser.
You should upgrade or use an alternative browser.
Evo bolt on coilover install
- Thread starter Atch
- Start date
cozdude
Guy with a Red 2-Door
Like this. ....
This is how I run mine as well
Crystaliner
Doesn't know shit about wheeling
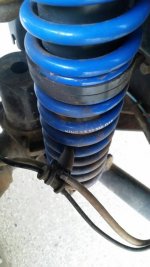
Make sure you install the hose and zip tie trick or you will be crushing abs sensors and brake lines
Last edited:
Rubicon john
New member
Thanks for all the good advice.
My next question is when I install the evo front lower control arms does the gold end bolt to the rear part and black to the axel? Do both the grease fittings face up?
My next question is when I install the evo front lower control arms does the gold end bolt to the rear part and black to the axel? Do both the grease fittings face up?
13_gecko_rubi
Caught the Bug
Both zerks facing up yes. I swapped mine to 90 degree zerks to make it easier to grease.
The johnny joint goes on axle, bushing goes on frame.
The johnny joint goes on axle, bushing goes on frame.


dchew
Active Member
I used it, but that was 3 years ago; not sure if anything changed since then but your bracket looks the same. Here is a post I made back then with way too much info on how to mount that plate and the bracket:
Back to the front coilover (CO) mounts for a second. The instructions say to slide the bottom plate/ring through the bump stop, align it with the existing 1/2" hole, center it around the bump stop and mark the two 7/16" holes. Then drill those holes and install the CO mount by cutting the plastic above as necessary.
It is subtle, but I recommend the following sequence:
- Temporarily mount the CO bracket using the 1/2" bolt (no nut)
- Swing the CO bracket around and do the necessary plastic cutting above for clearance
- Cut enough plastic ribs away to get the bracket swung into position and lined up with the two upper holes in the stock shock mount
- Add the bottom plate around the bump stop
- Add the nut to the existing 1/2" bolt above the bump stop and begin tightening
- Add a 1/2" nut and bolt to the lower hole in the stock shock mount
- Using these two bolts as your positioning guide, tighten them up. At the same time position the bottom ring centered around the bump stop
- Now drill one of the two 7/16" holes. You can check your alignment using the butt end of two drill bits; one above in the CO mount and one from below in the bottom ring
- Install the bolt for the new hole (this eliminates the possibility of accidentally twisting the bottom ring while drilling)
- Drill the second hole and install the bolt
This sequence ensures the CO mount is in just the right position for all the bolts to line up. It's not the EVO brackets that vary... It's the Jeep!
Use these two bolts for positioning the bracket in #7 above. Then drill for the other bolts:
View attachment 14663
13_gecko_rubi
Caught the Bug
I used them on mine. Like the instructions say
Blackjk58
New member
I used it, but that was 3 years ago; not sure if anything changed since then but your bracket looks the same. Here is a post I made back then with way too much info on how to mount that plate and the bracket:
How did you manage to aline the plate with the existing hole and aline the 2 other hole? I have hard time trying to aline plate hole with the tower hole. When i have one perfectly aline the second is off by a bite!? Trick or pick would help thanks !
13_gecko_rubi
Caught the Bug
I was kind of like hunrichs. Drilled blind and they lined up. I think I had to Reem the one hole a bit
How did you manage to aline the plate with the existing hole and aline the 2 other hole? I have hard time trying to aline plate hole with the tower hole. When i have one perfectly aline the second is off by a bite!? Trick or pick would help thanks !
I put a wright up on my build thread "up next" on how I lined those up. Hope that helps
dchew
Active Member
How did you manage to aline the plate with the existing hole and aline the 2 other hole? I have hard time trying to aline plate hole with the tower hole. When i have one perfectly aline the second is off by a bite!? Trick or pick would help thanks !
See #7 and #8 in my list, along with the photo attached in that post. If you have those two bolts in the pic mounted and tight, you can then center the plate underneath around the bump stop. The two-drill bit and/or two bolt trick works pretty well. Place the lower one in the pre-drilled plate hole, then line up a drill bit from the top. Spin it a bit, punch it then drill a pilot hole to center the big bit.
Dave
Havoc40
New member
I forget what I did for those holes, but I somehow got it to work drilling almost blind and they all lined up.
I was kind of like hunrichs. Drilled blind and they lined up. I think I had to Reem the one hole a bit
Glad I wasn't the only one who did it this way

Extremneon
Member
Working on the front now on my Jeep. One side is pretty much done, just need to trim up the metal inner fender well to fit. I had to cut a good bit of plastic into the the battery compartment to get my CO bracket to fit on the passanger side. Now I can see into the battery tray from the outside of the jeep, this was the only way I could get the bracket to line up and clear. Was kinda nervous as I was afraid I would cut into something important like wires, but it appears all is well.
I tried a few different combinations with the spacers on the coilover mounts. This is not covered well in the instructions provided with the kit. I ended up using the two provided King spacers on the top mount. The bottom mount I used the provided 1 of 2 Evo spacers (larger) on the inside of the bottom mount and the King spacer on the outside. As I kinda figured with only two provided spacers from Evo with the front kit I could only use one on each side. It seems to work and took the space out of both sides on the lower mount.
Pretty straight forward install so far. I laid out all the bolts, washers and nuts and kinda looked at what needed to be installed and made a determination on what size bolt went where. As this is also not documented very well in the instructions.

I need to now drill out the knuckle for the flip adapter. This is only temporary until I upgrade to Reid knuckles, RCV Axles, C's, gussets, ball joints.
Now need to get started on the drivers side then the rear. I went ahead and pulled the exhaust and installed a Dynomax Competition exhaust to help with clearance and make the install go faster in the rear.

Last edited:
13_gecko_rubi
Caught the Bug
Just finished to install my front evo bolt on coilover and was wondering if you guys was torquing all the bolt with the air gun or with the torque wrench?
I used a torque wrench. Air gun you have no idea what they are at besides gud-n-tight
Blackjk58
New member
I used a torque wrench. Air gun you have no idea what they are at besides gud-n-tight
Thanks, at what torque are you tight them ?