The build/re-build of Gruff

Yvan06

New member
LOL...no worries! A tone ring is a toothed ring found on each wheel with a sensor reading them. These are read by the vehicles computer and the vehicles anti-lock brakes or stability controls are activated accordingly.

In my case when I am making a left hand turn and accelerate hard, the stability controls activate and cut the throttle off and I have no power. Not too thrilling when you just pulled out and there is traffic coming at you...

This is what the front one looks like

View attachment 180398


Thank you very much :)

I hope everything will be fixed soon. This car is so badass ! So I believe that everything works as supposed when you disable the ESP ?
 

Ddays

Hooked
Adding back-up lights

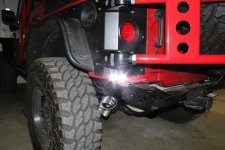
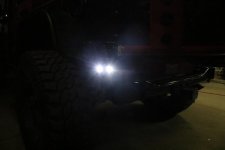
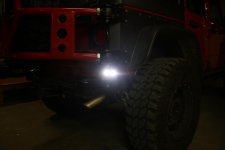
So one of the small issues with the EVO skins and single lights they utilize is that you lose the back-up light. I've seen someone elses' build thread where they used the Eagle Eye LED lights mounted on the lower pinch seam on the corners as the backup lights so I ordered a set from Amazon ($5.79/pair). Just spliced them into the harness.
As far as mounting them, there is already one square hole on the drivers side and I drilled another so that it points at an angle. Just duplicated that on the passenger side. These little lights are bright!

l-8.jpg 7D_10776.jpg l-9.jpg
 

Ddays

Hooked
Adding third (and fourth) brake light

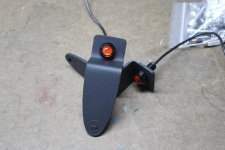
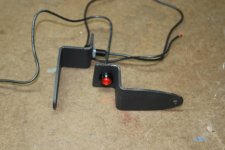
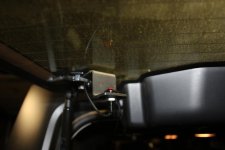
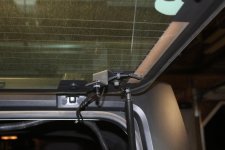
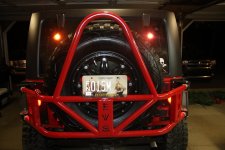
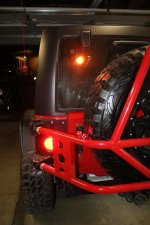
One other thing is finding a spot for a third brake light. I got the idea for this from looking at the brackets that my light bar came with. It wasn't long enough for what I needed so I cut a longer piece from flat aluminum stock and bent it up in my vice. Then drilled a couple holes for the Eagle Eye lights and mounting screws. Again, I got these on Amazon. I chose to mount the brackets inside the Jeep so I wouldn't have to worry about concealing any wires. I used a plug so that when I take the top off I can just unplug them. I decided to use two lights so that you could always see at least one of them no matter where you were behind me. I used the posts that the struts are connected to on the rear window. The bolts are long enough to acommodate the bracket & still tighten. l-1.jpg l-2.jpg l-3.jpg l-4.jpg l-5.jpg l-6.jpg
 

cozdude

Guy with a Red 2-Door
Damn good idea with the third brake light! You prob could have gone without it tho lol I haven't had one in almost 4 years and not once was anything said during inspection :shh: :donttell:
 

Ddays

Hooked
Thanks! Honestly, I wasn't going to bother with this since it's kinda like the fender issue here, don't ask, don't tell, but I noticed if I was at a certain angle, the struts on the EVO carrier block the tail lights. You can even see that a little from one of the photos. I was putting the brackets from my light bar away and the idea came about and figured what the heck...
 

WJCO

Meme King
One other thing is finding a spot for a third brake light. I got the idea for this from looking at the brackets that my light bar came with. It wasn't long enough for what I needed so I cut a longer piece from flat aluminum stock and bent it up in my vice. Then drilled a couple holes for the Eagle Eye lights and mounting screws. Again, I got these on Amazon. I chose to mount the brackets inside the Jeep so I wouldn't have to worry about concealing any wires. I used a plug so that when I take the top off I can just unplug them. I decided to use two lights so that you could always see at least one of them no matter where you were behind me. I used the posts that the struts are connected to on the rear window. The bolts are long enough to acommodate the bracket & still tighten.

That turned out sweet. Great job.
 

Ddays

Hooked
That turned out sweet. Great job.

Thanks!
Never did post the photos of the winch rope debacle. Like you noted, threading the end through that little hole in the drum is a lesson in patience. After 15 minutes of it not going anywhere, I went and got my bottle of Murphys oil Soap and dipped the end into the soap, and Viola! slipped right in (insert crude jokes here). So I wound the rope on the drum and right at the very end noticed that I forgot to thread the beginning of the rope through the fairlead. :doh: So I had to unwind the rope and start over. Now I had to get the damn end back out of the drum and that was even worse than trying to get it to go in the first time! :furious3: Finally got it out of the drum, threaded the rope through the fairlead this time, wound it up, and pulled into the garage. Went to put my tools away and there sitting on the workbench was the goddam slip sleeve that goes on at the hook end of the rope. Time to get your earmuff meme out cuz man, I was cussing like a mofo!


The sleeve is still sitting on my workbench.
 

WJCO

Meme King
That sucks. I must have missed this post. I don't blame you for leaving the sleeve off.

Thanks!
Never did post the photos of the winch rope debacle. Like you noted, threading the end through that little hole in the drum is a lesson in patience. After 15 minutes of it not going anywhere, I went and got my bottle of Murphys oil Soap and dipped the end into the soap, and Viola! slipped right in (insert crude jokes here). So I wound the rope on the drum and right at the very end noticed that I forgot to thread the beginning of the rope through the fairlead. :doh: So I had to unwind the rope and start over. Now I had to get the damn end back out of the drum and that was even worse than trying to get it to go in the first time! :furious3: Finally got it out of the drum, threaded the rope through the fairlead this time, wound it up, and pulled into the garage. Went to put my tools away and there sitting on the workbench was the goddam slip sleeve that goes on at the hook end of the rope. Time to get your earmuff meme out cuz man, I was cussing like a mofo!


The sleeve is still sitting on my workbench.
 

Recurve

New member
Your build is awesome!!! I love the little rolling dice on your evo carrier , cool little touch.

I will deff be asking you questions whenever I get around to evo skins lol.
 

Ddays

Hooked
Your build is awesome!!! I love the little rolling dice on your evo carrier , cool little touch.

I will deff be asking you questions whenever I get around to evo skins lol.

Thanks! Please feel free to ask anything. Hinrich had a great tip on mounting the hinges that would work wonders along with the 2 x 4
mounting jig I cribbed from MTG's build thread. Jim's tip is below:

Quote Originally Posted by hinrichs View Post

Dont think its right, but what I found out for me personally, was to get the drivers side upper started which is easy, then get the passenger sides both lined up and mounted. Make it open and close well, then latch the driver side upper, and slide in the lower mount into place then mark it. I had a problem with both of my installs where after it was drilled and all, the lower drivers side mount was a little high or low making it very hard to open and close.


Join the cool kids club already and order a set

:thumb:
 

Recurve

New member
Yeah , Hinrichs did a good job on his. Reading over his thread an yours just makes me leary on the nut inserts lol.

Not that I can't do it, just being how we are all from PA , my jeep is rusty enough an those nut inserts are just dying for rust to get in there lol.:icon_crazy:
 

Ddays

Hooked
Yeah , Hinrichs did a good job on his. Reading over his thread an yours just makes me leary on the nut inserts lol.

Not that I can't do it, just being how we are all from PA , my jeep is rusty enough an those nut inserts are just dying for rust to get in there lol.:icon_crazy:

I'm with ya on the rust issue but I used this formula in determining the installation of this carrier:

Functionality + badass quotient + quality + looks - installation jitters > rust quotient

I'm pretty sure you can plug in lots of shit into that formula!
 

Ddays

Hooked
Finally Finished with all of the Dealer work.

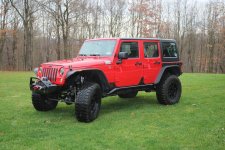
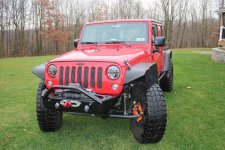
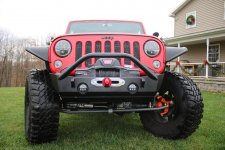
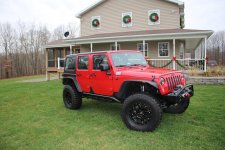
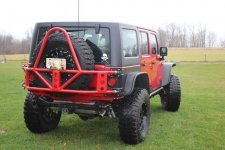
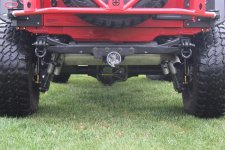
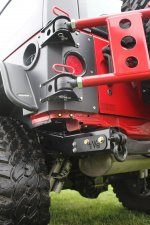
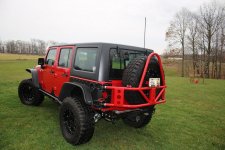
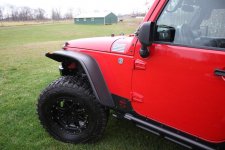
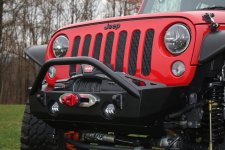
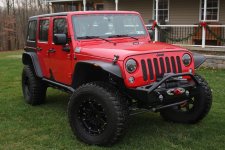
Finally finished up a couple weeks ago with the last of the nagging issues left over from the accident back in SEPTEMBER! One was a broken linkage part that wouldn't allow me to engage 4-Lo. I also had a cracked tone ring on the left rear axle and after arguing with the dealership to fix it its finally done. This was causing the stability control to activate when making a left hand turn from a standing stop. Not too fun of a feeling when there is traffic coming up from behind. They ordered a complete axle from Dynatrac, installed it and finally everything is fine. They did give me the old axle so I do have a trail spare. Here are the last of the poser photos I'm gonna post. Now that I can finally get out & wheel this thing the next ones will be some action shots. Going to Moab first week of April and again in the first week of July. Cant wait!

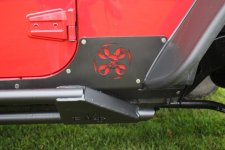
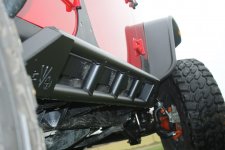
J1.jpg J2.jpg J3.jpg j4.jpg j5.jpg j6.jpg j8.jpg j9.jpg j10.jpg j11.jpg j11a.jpg j12.jpg j13.jpg

Last up will be a set of Chamber Pro's & Nitto Trail Graps. That will be done before first trip to Moab.
 

Ddays

Hooked
So I just couldn't resist adding last few poser pics

I found a program on our computer I didn't even know we had. Allows some really cool photo editing....just couldn't resist posting these as well.. j14m.jpg j15.jpg
 
Top Bottom