You are using an out of date browser. It may not display this or other websites correctly.
You should upgrade or use an alternative browser.
You should upgrade or use an alternative browser.
The build/re-build of Gruff
- Thread starter Ddays
- Start date
Benito
Caught the Bug
I apologize man - I didn't see your post until tonight - hopefully these help? If you are looking for something specific let me know!
View attachment 190931
View attachment 190932
View attachment 190933
View attachment 190934
View attachment 190935
View attachment 190936
View attachment 190937
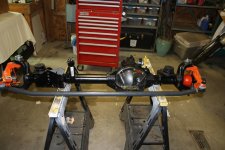
Thanks Ddays, those will help out a lot!, i see that you have what appears to be the synergy trackbar bracket. the raised trackbar bracket from dynatrac has slightly less surface area to weld the PSC tabs on but it looks like it will all come together, a bit tight though.
Ddays
Hooked
Thanks Ddays, those will help out a lot!, i see that you have what appears to be the synergy trackbar bracket. the raised trackbar bracket from dynatrac has slightly less surface area to weld the PSC tabs on but it looks like it will all come together, a bit tight though.
Good luck with install. So far I'm really happy with the on-road handling. Tightened the response up a lot but its not twitchy. Can't wait to get out on a trail...
Ddays
Hooked
Fender chop
Took my Bushwacker flats off and mounted the factory flares back up. After looking at roughly 2 million fender chop photos I decided to just get the roll of tape out & see what looked good.
Here's what I ended up with:
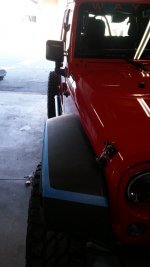

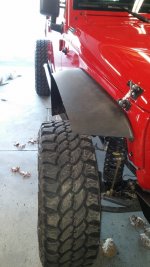
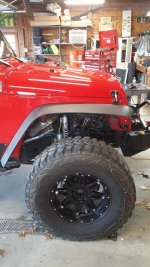
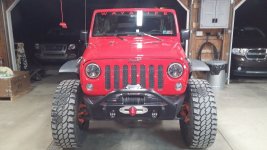
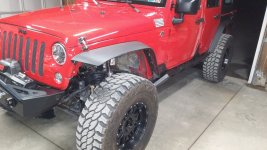
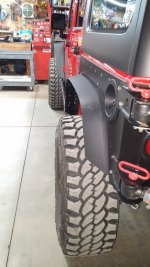
I love these little Eagle Eyes - threw in a couple yellow ones for side marker lights. These fit in the existing hole in the fender with no additional drilling. Very bright too.
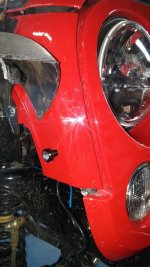
Took my Bushwacker flats off and mounted the factory flares back up. After looking at roughly 2 million fender chop photos I decided to just get the roll of tape out & see what looked good.
Here's what I ended up with:


I love these little Eagle Eyes - threw in a couple yellow ones for side marker lights. These fit in the existing hole in the fender with no additional drilling. Very bright too.

Ddays
Hooked
Looks good. I Iike the cut fender look.
Thanks bud! This look has really grown on me. I really wanted to cut these back more but one trip through some mud convinced me to leave as is!
Saharaunlmtd
Caught the Bug
Can't wait to see those wheels and tires mounted up.
Ddays
Hooked
Can't wait to see those wheels and tires mounted up.
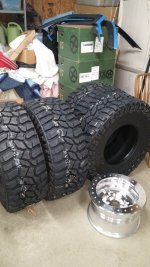
Me too! Was gonna try to get em mounted up this weekend but still haven't had the chance to put the Sharkhide coating on the wheels yet.
If I can get the garage warm enough I may try anyways....
Those wheels and tires look sick!
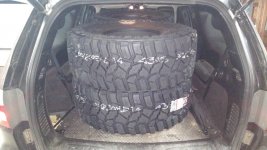
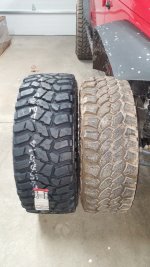
Thanks man - I love these tires! Glad Eddie posted his thread on these when he did - I was literally a day away from getting a set of Trail Grapplers (not that that would have sucked mind you)
I love the polished aluminum.
Ddays
Hooked
Sharkhide!
So originally I was going to wait til it got warmer out to apply the Sharkhide to my wheels but after reading the instructions (yes, I know...) they say that this stuff can be applied in temperatures between 20-100 degrees, BUT, it specifically states the colder the better. So being that its 25 degrees tonight, I figured that's plenty cold enough. Bonus is that the new case of beer I bought a couple days ago is out next to the wheels!
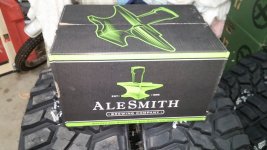
Let's see...how many beers does it take to coat 5 wheels with Sharkhide?
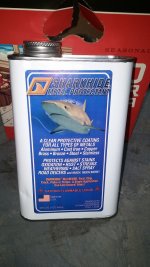
One....
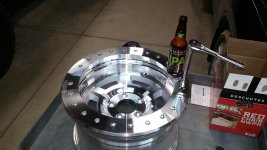
Two and three are in there somewhere...
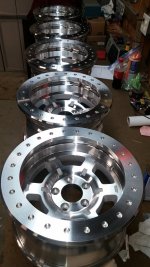
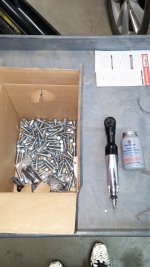
Four was after I looked in this box to see how many of these bolts I get to torque down tomorrow...
Bought the economy size bottle of anti-sieze too. Time to watch the video of Mel installing these beadlocks a couple times and
get the tires mounted up tomorrow...
So originally I was going to wait til it got warmer out to apply the Sharkhide to my wheels but after reading the instructions (yes, I know...) they say that this stuff can be applied in temperatures between 20-100 degrees, BUT, it specifically states the colder the better. So being that its 25 degrees tonight, I figured that's plenty cold enough. Bonus is that the new case of beer I bought a couple days ago is out next to the wheels!

Let's see...how many beers does it take to coat 5 wheels with Sharkhide?

One....

Two and three are in there somewhere...

Four was after I looked in this box to see how many of these bolts I get to torque down tomorrow...
Bought the economy size bottle of anti-sieze too. Time to watch the video of Mel installing these beadlocks a couple times and
get the tires mounted up tomorrow...

Ddays
Hooked
How does/did the shark hide product go on? Do you buff it off after putting it on or does it soak into the aluminum? 1 or 2 coats? Going with those wheels eventually is why I asked
Really, it was a very simple application. I wiped the wheels down with lacquer thinner and then wiped the sharkhide on. No buffing. I did use a brush to apply it to the openings in the wheels as it was easier to reach into them that way. I then applied to the rest of the wheel with an old lint free rag. They say diaper but anything with little lint will work just fine.
Edit: it doesn't say anything about more than one coat. It states on the label that one coat will last for a couple years. I'll probably just go with one coat & see how it wears.
Last edited:
JKbrick
Active Member
Really, it was a very simple application. I wiped the wheels down with lacquer thinner and then wiped the sharkhide on. No buffing. I did use a brush to apply it to the openings in the wheels as it was easier to reach into them that way. I then applied to the rest of the wheel with an old lint free rag. They say diaper but anything with little lint will work just fine.
Edit: it doesn't say anything about more than one coat. It states on the label that one coat will last for a couple years. I'll probably just go with one coat & see how it wears.
It sure looks good, someday I'll get there but I'm too much of a tight ass to buy anything till my tires wear out which is hard to do when it only got 1600 miles on it last year
Ddays
Hooked
It sure looks good, someday I'll get there but I'm too much of a tight ass to buy anything till my tires wear out which is hard to do when it only got 1600 miles on it last year
Thanks and I hear ya. My problem is that I am an impatient SOB. I got such a great deal on those tires ($315 a piece!) that I just went ahead and got them.
Clutch
Caught the Bug
First up is the new bumper. Full Metal Fabworks Apex Pinnacle and a set of JW Speaker fogs. Too bad Truck-Lite hasn't come out with a fog yet.
First remove Smittybilt SRC bumper the dealership replaced after the wreck.
View attachment 170405
View attachment 170406
Relocated vacuum pump with bracket from FMF. Similar to the Teraflex bracket. Not sure I am going to leave this here. Going back and forth on where to mount my compressor. Where this is or under the passenger seat....
View attachment 170407
Had to cut small ear off of the pump mounting bracket.
View attachment 170408
All painted up. Used paint from SEM - Trim Black. We'll see how it holds up this winter
View attachment 170409
New Jdubs
View attachment 170410
Nice craftsmanship
View attachment 170411
Finished!
View attachment 170414
I seriously like this bumper, rethinking the evo now. Where did you get it, straight from FMF?
Last edited:
Ddays
Hooked
I seriously like this bumper, rethinking the evo now. Where did you get it, straight from FMF?
Yessir - nice guy to deal with too! I liked the Evo bumper but I just wanted something a little different. There's a couple other guys here running this bumper. I know AllAmericanInfidel is but not sure of the others. The trimming required is minor. Glad I got this one.
Ddays
Hooked
Wheel mounting
Watched Mels video twice then went out & gave it a go. First attempt didn't end well. Was having trouble getting the ring to tighten down onto the wheel and there was a large gap. Took it back apart soaped it up good and went around in a circle gradually torquing the bolts. That did the trick. I'm not pit crew material but I know how to do it now!
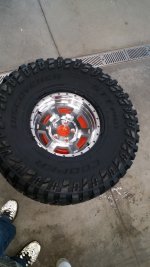
Getting to this step shown below with the wheel assembly was the most difficult. Watching Mel, he is able to get the wheel to go right into the tire with little drama. Granted, he's done hundreds of these but I was literally jumping on mine. Chasing the bead around in a circle with the two screwdrivers trying to get it to seat was frustrating, but the second one went pretty eassily.
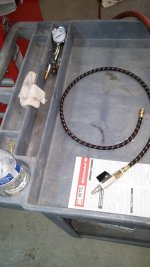
I made up a short air hose with a remote valve to air up the first time.
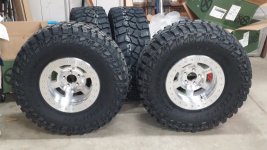
So I was able to get two done this afternoon. Not bad. The first one I did was a learning experience. The second one only took an hour or so. Got both aired up to 40 psi. Will check in the AM & hopefully find they both held that pressure!
Watched Mels video twice then went out & gave it a go. First attempt didn't end well. Was having trouble getting the ring to tighten down onto the wheel and there was a large gap. Took it back apart soaped it up good and went around in a circle gradually torquing the bolts. That did the trick. I'm not pit crew material but I know how to do it now!
Getting to this step shown below with the wheel assembly was the most difficult. Watching Mel, he is able to get the wheel to go right into the tire with little drama. Granted, he's done hundreds of these but I was literally jumping on mine. Chasing the bead around in a circle with the two screwdrivers trying to get it to seat was frustrating, but the second one went pretty eassily.

I made up a short air hose with a remote valve to air up the first time.

So I was able to get two done this afternoon. Not bad. The first one I did was a learning experience. The second one only took an hour or so. Got both aired up to 40 psi. Will check in the AM & hopefully find they both held that pressure!

Clutch
Caught the Bug
Yessir - nice guy to deal with too! I liked the Evo bumper but I just wanted something a little different. There's a couple other guys here running this bumper. I know AllAmericanInfidel is but not sure of the others. The trimming required is minor. Glad I got this one.
Thanks for the follow up. Your build looks really nice, I'll be tuned in going forward.

