The CALAMITY of Jane

wayoflife

Administrator
Staff member
Now I see why you like the poison spyder sliders. They look really good!

Oh, it just occurred to me that I never posted up some pre-install shots prior to taking the rocker guards to powder coat. Check it out :cool:

main.php


main.php


main.php


main.php


main.php
 

ob_tj

New member
Oh, it just occurred to me that I never posted up some pre-install shots prior to taking the rocker guards to powder coat. Check it out :cool:

Really do like the look of them! I might have to buy a set for my TJ! I had never seen them installed on anything.
 

wayoflife

Administrator
Staff member
Really do like the look of them! I might have to buy a set for my TJ! I had never seen them installed on anything.

Like I said, they look real nice and offer a lot of protection. It would have been better if we had a later model CJ. The TJ ones are even better.
 

Ddays

Hooked
Even though its a ton of work, at least this is a nice and straightforward vehicle to do this kind of work on. One of the nice things about vintage vehicles. Sadly. there's not many of those left over on this side of the country though.
Just look at Pigs' Vette. And that was stored inside! Looking forward to seeing your progress on this one.
 

QuicksilverJK

Caught the Bug
I have always loved the CJ5. One day (when I have nothing else to do to my Jk lol) I will be looking for a restore project just like her. Good work, looking foreword to seeing how she progresses.
 

Breer

Caught the Bug
Looking great! Tons of work I know but, it's worth it! Curious to see what you do with the brakes/axles. Those manual brakes are interesting on the trail!!

Looks like you have a flanged Dana 44?
 

wayoflife

Administrator
Staff member
Oh yeah, we're super happy about having a Jeep that's always lived out in Nevada and California as there's surprisingly very little rust on it. Most of the issues we're coming across has come from abuse and stupidity from previous owners. Regarding brakes, yeah, drums on all 4 corners and without even a booster can make things interesting. It'll definitely be something we'll have to address in the future.
 

AZMikeD

New member
Great progress! I look forward to continuing to follow the restoration. That blue with the Renegade decals is gonna look killer.

I've been looking at sliders for my LJ. I haven't decided yet but really like the look of those.

Thanks for sharing the progress! I hope to see more!
 

wayoflife

Administrator
Staff member
I had posted these up yesterday but thanks to our upgrade woes, it was and so now I'm posting them up again so that there's a record of it here.

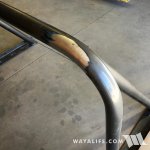
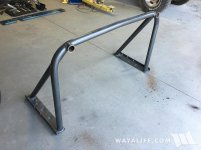
Since the last time I've posted on this thread, Cindy and I have been able to get more work done on Jane and in the process of it, were able to reveal a few more of her calamities. Up first was the problems we were seeing with her roll bar. Apparently, the previous owner thought it would be a good idea to weld in front supports to the factory roll bar to make it into a full cage. And, while this may have been a good idea, his welding skills weren't anything to write home about and being mounted to the floor pans the way they were was causing it to break the spot welds securing it to the rocker panels. Anyway, because of all this, we decided to just cut them off and restore the factory roll bar back to its stock form. Here's a shot of the roll bar after we cut the front supports off.
IMG_0194.jpg

After carefully grinding and sanding off what was left of the homemade cage, this is what it looks like now.
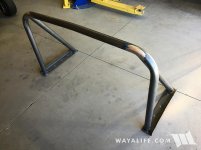
IMG_0262.jpg

IMG_0261.jpg

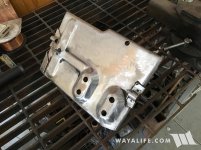
Another project we decided to take on was to clean up the rusty battery tray. Unfortunately, we didn't take a pic of what it looked like but here's a shot of what it looked like after Cindy applied some elbow grease to it.
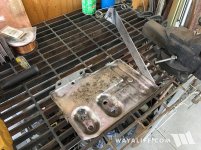
IMG_0161.jpg

IMG_0162.jpg

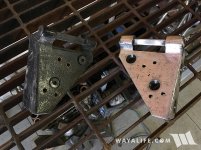
While she was at it, she decided to give the windshield brackets a cleaning too. Here are a couple of side by shots to show you what they looked like versus what it looks like now.
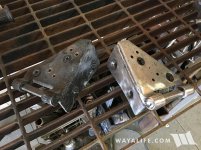
IMG_0174.jpg

IMG_0175.jpg

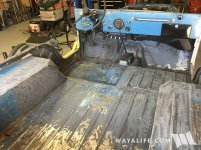
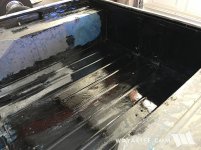
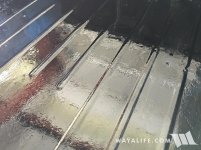
While there was nothing cancerous about it, the tub did have some surface rust that we wanted to address and so we spent a lot of time cleaning it up. And, while we were at it, we decided to scour the rest of the tub with the intention of bed lining it in the future.
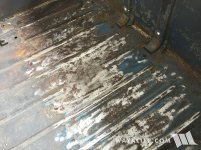
IMG_0140.jpg

IMG_0148.jpg

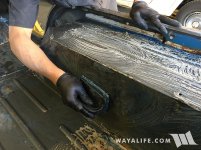
Here's a shot of me scrubbing everything down with degreaser.
IMG_0154.jpg

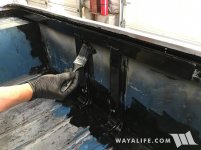
After applying metal prep to the infected areas, I applied some POR 15 to it.
IMG_0224.jpg

IMG_0226.jpg

IMG_0233.jpg

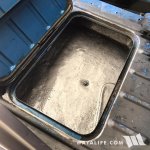
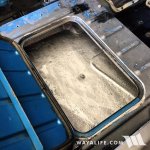
I also took some time to thoroughly clean out the tool box of any rust, weld up a couple of holes and give it a coat of POR 15 silver to keep it in good shape.
IMG_0267.jpg

IMG_0268.jpg

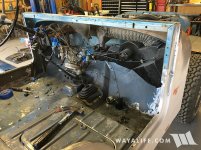
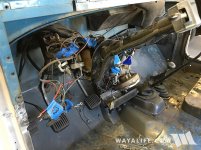
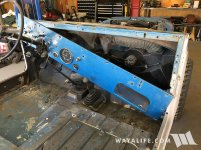
And finally, I started to take apart the dash so that I could get it ready for paint and work on cleaning up the rats nest of wires.
IMG_0164.jpg

IMG_0193.jpg

IMG_0191.jpg

Of course, while I was at it, I found this piece of ancient history. Back in the day, someone thought it would be a good idea to make Jeep parts out of paper. Things like the glove box and this crumbling windshield defrost nozzle. Fortunately, I know that Omix-Ada makes a replacement and out of plastic.
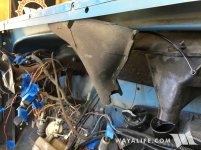
IMG_0210.jpg

I'm sure there's more calamities to be found and as I do, I'll be sure to post them up here. :crazyeyes:
 

NecessaryEvil

Caught the Bug
So neat to see history brought to life. I love restores. I also love to see people (such as you and Cindy) so dedicated to your interests. Keep up the great work.
 

wayoflife

Administrator
Staff member
Glad you're enjoying the progress!

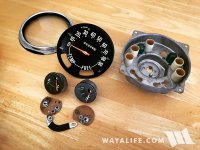
Here's a shot I forgot to include. The speedometer/instrument cluster was super dusty and grimy inside and this made it hard to see especially at night. So, I decided to take the whole thing apart to clean it up.

IMG_0288.jpg

Gonna pick up some orange model paint and touch up the needles before reassembling it. :yup:
 

notnalc68

That dude from Mississippi
Glad you're enjoying the progress!

Here's a shot I forgot to include. The speedometer/instrument cluster was super dusty and grimy inside and this made it hard to see especially at night. So, I decided to take the whole thing apart to clean it up.

View attachment 224454

Gonna pick up some orange model paint and touch up the needles before reassembling it. :yup:

Wow. Looks new. I'm enjoying this rebuild.
 

wayoflife

Administrator
Staff member
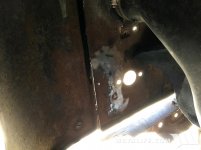
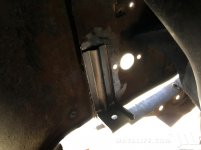
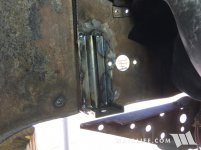
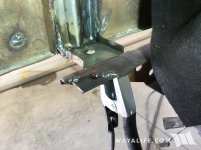
As I had mentioned in my first post, the few remaining body mounts on this Jeep CJ5 were all rotted out but pretty much every single one in the rear was missing altogether. Of course, in the case of the two quarter panel mounts, the L-brackets had torn off and were missing and on the passenger side, the rear cross member was damaged and needed to be repaired. I know it's a bit hard to see but, here's a shot of what things looked like there.
IMG_0294.jpg

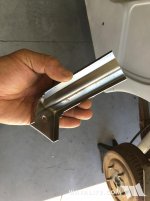
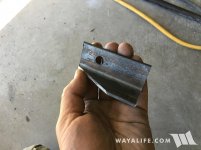
Fortunately, I was able to find brand new replacement L-brackets from Walck's 4 Wheel Drive and this is what they look like.
IMG_0304.jpg

Here's a shot of where the L-bracket should go.
IMG_0295.jpg

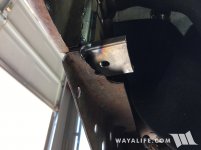
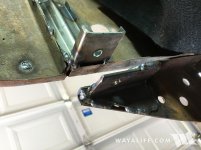
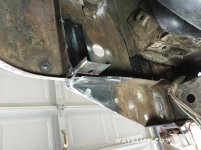
I know it ain't the prettiest thing but it was near impossible to get my head inside the fender well with a welding hood and the angles I was working in didn't help one bit. In some cases, I was essentially welding blind but I do think they'll hold and this is what it looks like.
IMG_0296.jpg

IMG_0297.jpg

Now it was time to fix the torn off end of the rear cross member. To do that, I cut down a piece of angle iron and drilled a hole where the body mount bolt would need to go through.
IMG_0299.jpg

Time to start burning it in.
IMG_0300.jpg

IMG_0301.jpg

Being that the end of the cross member is somewhat visible, I decided to clean things up just a bit.
IMG_0303.jpg

Now I just gotta make some time to install the new Omix-Ada body mounts we recently picked up. :yup:
 

wayoflife

Administrator
Staff member
Oh, we also got Jane's factory roll bar back from powder coat and this is what it looks like now :cool:

IMG_0309.jpg

IMG_0311.jpg

Good as new I think :yup:
 
Top Bottom