The CALAMITY of Jane

wayoflife

Administrator
Staff member
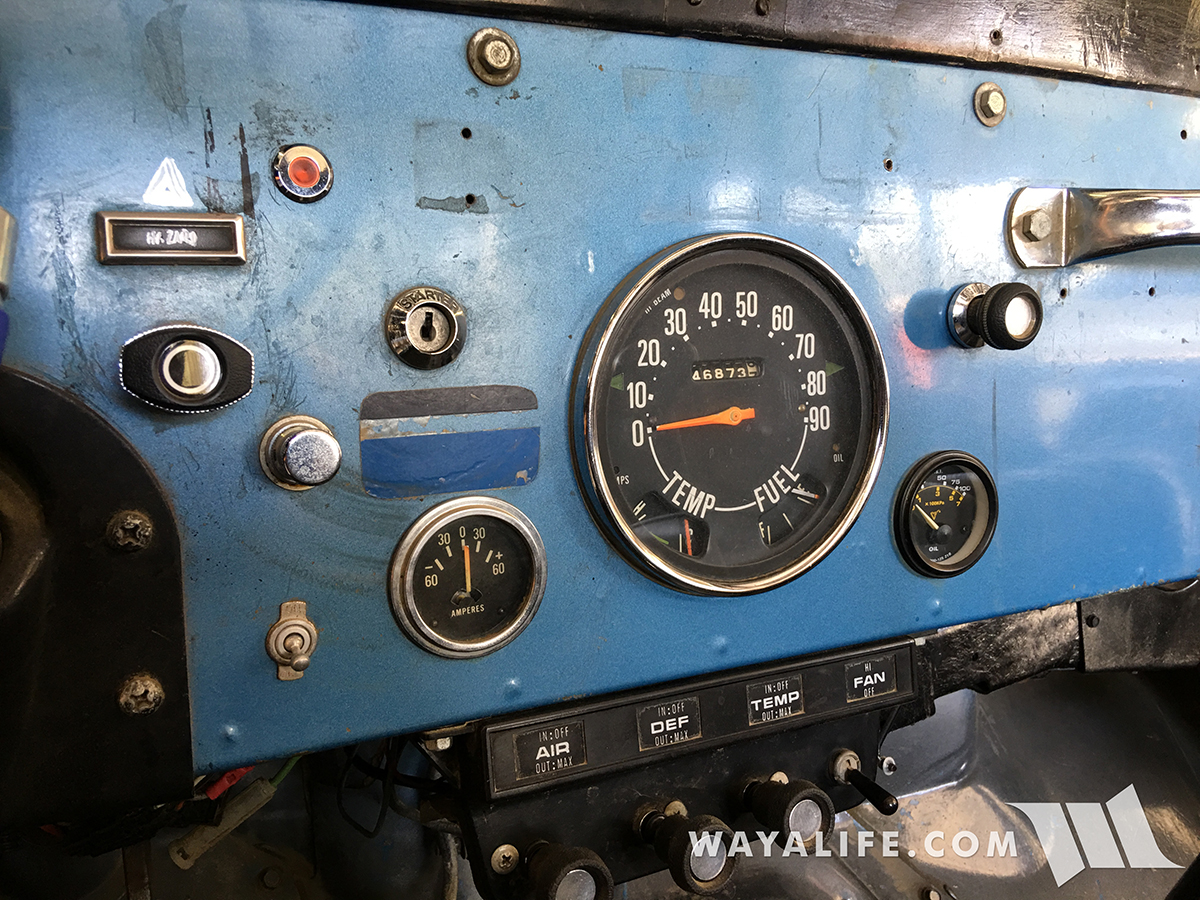
The speedometer was dirty and hard to see in the sun so I decided to take it apart the speedometer to clean it up. Here's a shot of what it looked like.
main.php


There's still some missing orange paint but here's a shot of what it looked like after cleaning up some of the dust, dirt and grime.
IMG_1475549867.391069.jpg

And, here's what it looks like with a fresh coat of orange paint in the needles and reassembled. Like new again :)
IMG_1475549916.228256.jpg
 

wayoflife

Administrator
Staff member
Also took apart the dash to strip it if it's paint and fix all the stupid holes that the previous owner punched through it. Here's a shot of what it looked like stripped down but before making any repairs.
IMG_1475550217.217975.jpg

And, here's a shot of what the dash looks like now all cleaned up and with the holes repaired.
IMG_1475550300.580158.jpg


Sent from my iPhone using WAYALIFE mobile app
 

bthomas

Member
Both look great, you took a LOT of years off of that speedo cluster! The before pic of the dash reminded me of an old VW bug I had as a kid. It was full of holes and cut outs.


Sent from my iPad using WAYALIFE mobile app
 

wayoflife

Administrator
Staff member
So, for those of you who've been following our Shaping Up thread, we've finally gotten Jane all ready for paint. Just the bare minimum has been reinstalled and nothing more to help make things easier and reduce the amount of time needed for prep. Last night, I installed a new battery, topped off the radiator and wired up the ignition key on the dash, turned the key and........ nothing. Did a quick visual check to make sure I didn't miss anything but couldn't see anything obvious. Guess I need to spend the day looking for bad wires, bad grounds and trouble shooting the calamities in Jane's starting system. :rolleyes2:
 

wayoflife

Administrator
Staff member
I was wondering if she was off to paint yet. Oh well. Enjoy the day of troubleshooting. Sounds like fun to me actually. Any day spent in the garage is a good day

LOL!! Oh yeah, happy to be out in the garage. Just know what's in store for me :crazyeyes:

That sucks. Good luck finding the issue.

Thanks, I think I'll need it. When I was taking everything apart, I could tell I might have some issues later being that so many of the wires were chaffed and falling out of their factory plugs. Fortunately, there aren't too many wires I need to be looking at or at least, to get this thing started.
 

wayoflife

Administrator
Staff member
Holy hell!! Talk about looking for a needle in a haystack!! Thoroughly checked all the wiring to make sure they were whole and repaired any questionable connectors. I then started to do some basic starter troubleshooting and initially came up with what I thought was a bad starter solenoid. Well, a quick trip to Autozone and a new solenoid later, the damn thing still wouldn't even click.
HMHU0436.jpg

So, I started the pains taking process of tracing wires. Would have been so much easier if the wires present were colors that matched what was in the FSM wiring diagram or were at least not faded to the point of not being real sure if I was looking at a red, orange or maybe even pink wire. Of course, it would have been real helpful if the wires were at least the same color all the way across instead of going from yellow to red and then blue! This whole thing was frustrating as hell being that I knew what wire I needed and where it should go but I just couldn't find it. As luck would have it, Cindy was looking through the FSM and noticed that the wire in question would be a 10 gauge and this got me thinking about a couple of really thick wires that I left disconnected behind the dash. They were for the factory amperes meter, something that wasn't covered in the wiring diagram and looked to be about 10 gauge wires. And, while the colors in question were still wrong, it started to make a lot of sense that these wires needed to be connected to the meter or at least to each other and that's what I did.

DRQE0183.jpg

And, with just that simple fix, I got Jane running again! :crazyeyes:
 

Bullwinckle

Hooked
What a pain in the ass that was. all that work tracking it down for one little thing haha gotta love older jeeps. Glad you got it figured out and can't wait to see her all painted up!


Sent from my iPhone using WAYALIFE mobile app
 

wayoflife

Administrator
Staff member
While we wait to get Jane into paint, I decided to spend a little... ok, a lot of time rebuilding her Holley 4-barrel carb.
final.jpg


..................................................
Watch WAYALIFE YouTube Videos
WAYALIFE Jeeps & Specs
 

wayoflife

Administrator
Staff member
Good to see you working on this one again.

Yeah, been wanting to work on her for a long time now but have been too busy with other projects or working on Moby. As much of a pain as it is, it's good to be turning wrenches and screw drivers on old iron again :yup:

LOL, Not sure if I miss those days or not.....Definitely don't miss it when its on your only vehicle and it won't run worth a damn!

LOL!! Not exactly why I would prefer to do but I was getting sick and tired of her not running as well and she could be. Most of Jane's problem was with her choke but I decided to just to a rebuild to make everything new again. :yup:
 

WJCO

Meme King
What does a carb rebuild kit cost these days? The last one I did was like 20 bucks if I remember right about ten years ago or so.
 

wayoflife

Administrator
Staff member
What does a carb rebuild kit cost these days? The last one I did was like 20 bucks if I remember right about ten years ago or so.

Surprisingly, for a factory carb, it's still about the same. For something like a Holley, it can be more like $30 a $40 for a complete kit.


..................................................
Watch WAYALIFE YouTube Videos
WAYALIFE Jeeps & Specs
 
Top Bottom