The Slimer Build Thread

MTG

Caught the Bug
Prime8 said:
Another road block... This 1/4 Pounder install is a nightmare...

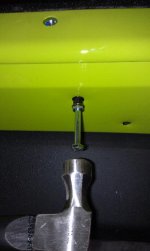
In order to be ready for full install once the vacuum relocation kit arrives, I decided to go out and get the sway bar disconnect motor relocated. Taped up my bit at 1/2" just like the directions said, and bored out the hole. Tried to thread in the bolt and it wouldn't grip the ~0.5mm left I'm the hole. So I trimmed it a little more. Still wouldn't grip. The third time it ate right through and bored the hole out completely. So now what...? Had to put the motor back in its original location since it wouldn't have held without any threading...

This install is quickly becoming a huge hassle, I hope the rear carrier doesn't have as many hiccups.

<img src="http://wayalife.com/attachment.php?attachmentid=6841"/>

<img src="http://wayalife.com/attachment.php?attachmentid=6840"/>

I'm not in front of my jeep but from memory that doesn't look like the spot I drilled. Can you take a pic a little further away?
 

Prime8

New member
I'm inside now. Couldn't take the pictures from farther away since the tire is there... Thats the only hole it could be, considering the really dark pictures in the install instructions. I even had to swing back the rubber isolator to be horizontal, not vertical, since making it vertical like it was wasn't possible. If I would have left the isolator in its original location, the bolt hole would have been 1-1.5 inch away from lining up, since the motor hits the bottom of the radiator. More detailed pictures would have been beneficial, but I'm pretty sure I drilled the right part. But the motor relocation is a poor design, since it requires a PERFECT drilling of the hole.
 

MTG

Caught the Bug
Still think you are in the wrong hole (or I am). ;)

image-3194321431.jpg
From the bottom.


image-509402349.jpg
Looking down.

Both taken from the passenger side looking toward driver.
 

Prime8

New member
MTG said:
Still think you are in the wrong hole (or I am). ;)

<img src="http://wayalife.com/attachment.php?attachmentid=6900"/>
From the bottom.

<img src="http://wayalife.com/attachment.php?attachmentid=6902"/>
Looking down.

Both taken from the passenger side looking toward driver.

Oh, I see where you drilled. I drilled the next hole up, you can see it in your second pic, near the top of the motor next to that electrical tiedown bracket. The directions didn't say to remove any additional bolts besides the initial one that goes through the isolator, so I didn't even consider your location. What is the reason for boring out the hole 1/2" deep in your location? I'll give EVO a call today and straighten this all out...
 

Prime8

New member
Yup, you're right, wrong hole. Brought up the install PDF on my phone, and while the picture is still ridiculously dark, its a little lighter than the printout. I will try drilling that new hole in the next day or two... Thanks!
 

Prime8

New member
Got the 1/4 Pounder with stinger installed! After that, I started doing the test fit of my rockskins and tire carrier. Need some tips on getting the corner, especially the bottom corner, of the rockskins flush against the body... In the picture below you can see I can comfortably fit my fingers between the body and the skins...


ForumRunner_20121117_180031.png


ForumRunner_20121117_180051.jpg
 

Prime8

New member
Notajerryskid said:
They will not fit flush. They are more square than the body.

Yeah, I know the corners will have room vertically, but the issue is that the top will get flush with the body, but the bottom isn't even close, as shown by my fingers. When you look at the rear of the vehicle, at the edge of the skins, the skins are angled. The bottom needs to slide in more. I don't want to mark and drill the holes till I'm sure they are lined up perfectly. Only get one chance with this. Measure twice, drill once. Haha.
 

White_JKU

New member
Great thread!! looking forward to the results!!! Im scared to death to even think about installing rear quarter skins!!!

I had to have a few drinks just to trim my fenders!
 

Prime8

New member
Got the holes drilled and over half of the nutserts in today for the EVO rockskins... Then wore out the nutsert tool. Tried using the "tool" EVO included, but it is worthless. The nutsert just spins in the hole... Headed to harbor freight tomorrow to get 2 more nutsert tools, just in case! But then it will probably be a couple weeks until I can test fit the skins and drill the holes for the tire carrier. Then a couple weeks at paint. This is gonna take a while!


ForumRunner_20121118_212529.png


ForumRunner_20121118_212606.png
 

Attachments

  • ForumRunner_20121118_212543.jpg
    ForumRunner_20121118_212543.jpg
    21 KB · Views: 552

Prime8

New member
Finally got the EVO carrier and skins to the powdercoater today. The test fit was a huge ordeal spanning 3-4 days over a months time...
Now the question I've got for all you californians that know nothing about corrosion... Haha.

When the parts get back from powder coat and I am performing final assembly, should I use teflon tape, anti seize, or something else on the threads of the nutsert bolts to keep water and corrosion out?
 

FoxC

New member
I used silicon and lined the inside of the skins following the contour about 2"'s from the edge. Also used the silcon on each nutsert to try and seal the bare metal after drilling.
 

Prime8

New member
I used silicon and lined the inside of the skins following the contour about 2"'s from the edge. Also used the silcon on each nutsert to try and seal the bare metal after drilling.

Yeah, I smeared the nutserts with black silicone before inserting. I was talking about the bolts that go in the nutserts.
 

Prime8

New member
More pics to follow... Just wanted to shoot this one out now since I just got it back with the Double D lift and the 37" Nitto Trail Grapplers.
 
Top Bottom