The Uncharted build

IceKnight

New member
LOL That was pretty awesome though... :D even having to clear roughly a 1/4 mile of tree debris. It left us with a good story and we didn't get attacked by the pack of coyotes we could hear roaming the woods :clap2:

Oh and next time we're going to bring the GoPro ;)

Yeah it was a pretty good time. I was thinking back to the stuff we cleared off the trail and quite a bit of it was stuff I could have easily cleared no problem. But I suppose clearing it was better then just happening to get stuck on something when you are trying to get out with a broken rig.
 

IceKnight

New member
Thanks for the compliments guys.

So I have been sick for basically this whole week and thought I would take the day off to try to relax a bit. That turned into watching Wayalife video's on my PS3 through YouTube. Which after watching a few I needed to work on my Jeep. So I got the thing started and limped it into the garage to fix the clutch line.

So with out further adieu
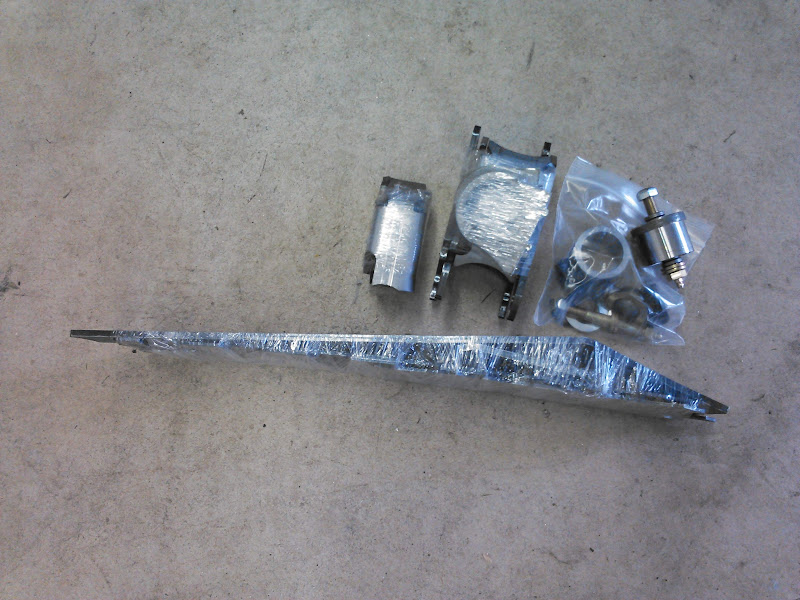
Installing an Advanced Adapters TJ Clutch cylinder line

This is a rather simple install, it can be done a few different ways, you can remove both the master and slave cylinder and do it on a bench or you can do it like I did.

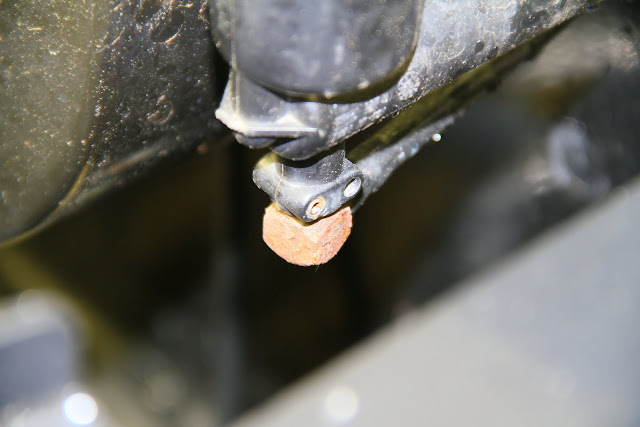
In my case I decided to leave the master attached to the fire wall and only remove the slave cylinder.

To start spray each roll pin with a little PB Lube to get them soaking. They will most likely be a little rusty.
IMG_8451.JPG


To remove the slave you'll need a 1/2 wrench.

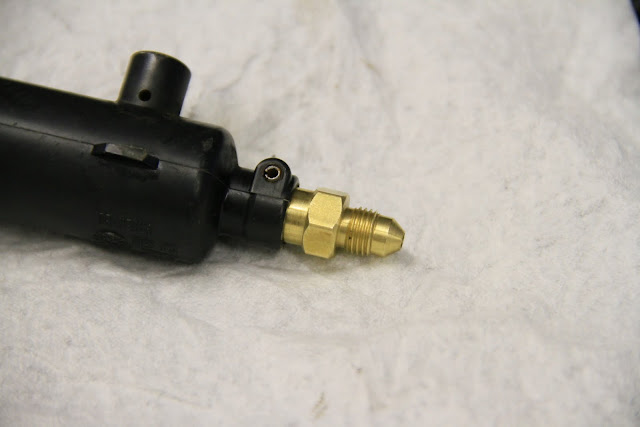
In my case as soon as I unbolted the slave the plastic hose nearly just fell away from the cylinder. (I think I found what my problem was)

IMG_8462.JPG


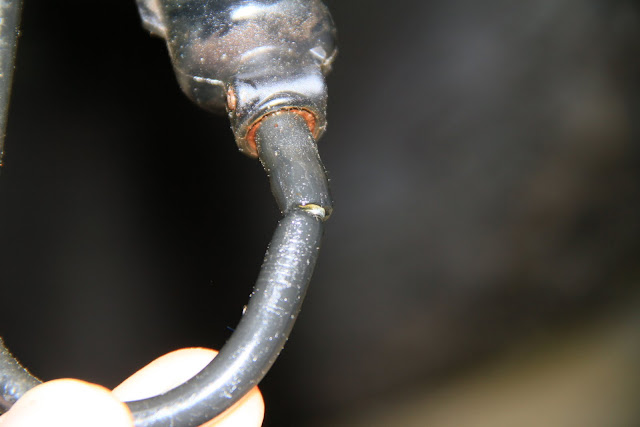
Now that the slave was out, I removed the roll pin, pulled the left over hose end out of the cylinder and cleaned and removed the o-ring from the unit.
IMG_8464.JPG

IMG_8466.JPG


You must reuse the o-ring on both the master and slave cylinder. I chose to remove both o-rings because I needed to clean out the rust and debris from the unit.

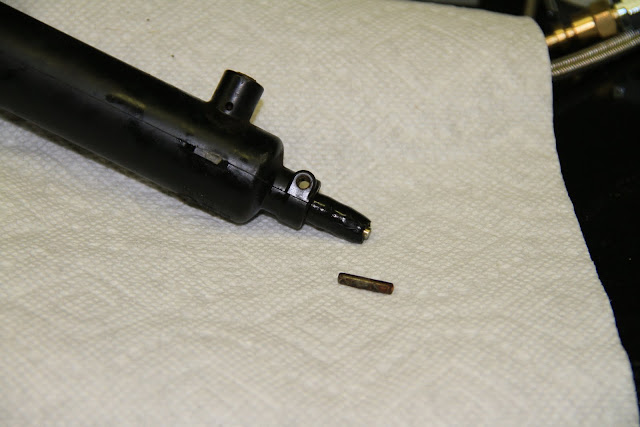
I used a little sandpaper to take the rusty edges off the roll pins and clean them up for easy installation.
After everything is cleaned up and ready to go, push the fitting into and the housing and put the roll pin back in.
IMG_8468.JPG

IMG_8470.JPG


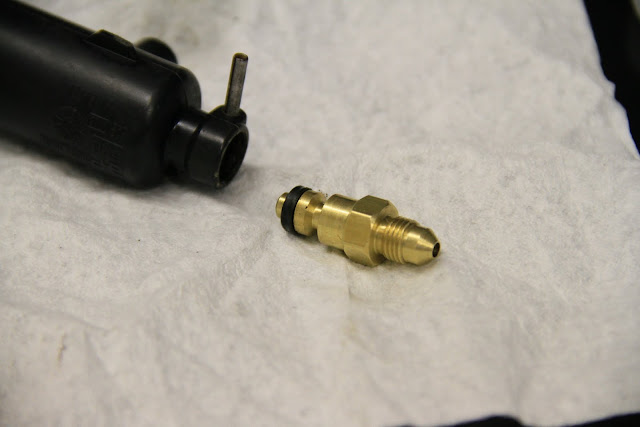
The master cylinder was much of the same, remove roll pin, clean everything out, remove o-ring clean it and install new fitting along with the cleaned up roll pin to hold everything in place.
IMG_8474.JPG


Then its simply a matter of installing the slave cylinder and attaching the two ends together with the new stainless braided line.
IMG_8477.JPG


Fill up the master cylinder with fluid and start pumping slowly and fully release the pedal at allow the air to get out of the system. (This might take a some time)

After you get pedal feeling back and it firms up, check to make sure you can get through the gears and things are feeling correct. Ta-da its fixed.

Now its time to get back out on the trail and put some more beauty marks on my Jeep. :D
 

IceKnight

New member
So I installed a new set of headlights, I went with a set of GE Nighthawk LED headlights. Basically a re-branded set of Trucklites.
I still need to take some night time photos of the light they produce. I must say its well worth the money. I was replacing a set of Silverstar which I at one point was an improvement. These are much more than an improvement, I must say I love being able to see at night now. The line of light these produce is very nice as well so your not blinding on coming traffic.

Before
Wrangler%2520Before%2520LED%2520Headlights%25201.jpg


After
Wrangler%2520LED%2520Headlights%25201.jpg
 
Last edited:

IceKnight

New member
Thanks, you gotta get a set, they are crazy bright, well at least when comparing them to regular halogen lights. I have to get some pics of the lights on at night...hold please.
 

IceKnight

New member
Alright so here are a few pics, Ill take better ones maybe when its not raining.

-Low Beam
Low%2520Beam.jpg


-High Beam
High%2520Beam.jpg


-High Beam + 2" Lights
High%2520Beam%2520plus%25202%2520inch.jpg


-High Beam + 2" Lights + 30" Light Bar
High%2520Beam%252C%25202%2520Inch%252C%252030%2520Inch%2520bar.jpg
 
Last edited:
Thanks, you gotta get a set, they are crazy bright, well at least when comparing them to regular halogen lights. I have to get some pics of the lights on at night...hold please.

I actually have to order 2 sets.... a set for me and a set for Patty now too... :icon_crazy:
 

IceKnight

New member
This is the beginning of my next project.

NCM_0232.JPG

NCM_0233.JPG


Here is what I am shooting for

Dana 30HP
Artec Truss
Artec C-Gussets
16" BBK
RCV's or cromo's
Aussie
HD Ball Joints
 

IceKnight

New member
So a little bit of an update. I finally took a few mins to get out there and do some front end investigation on my Jeep. Come to find out its my less then 1800 mile old ball joints that are junk already. So its looking like its time to find some new ones. Then do the ball joints, brakes and inner axle seals all at once.
 
So a little bit of an update. I finally took a few mins to get out there and do some front end investigation on my Jeep. Come to find out its my less then 1800 mile old ball joints that are junk already. So its looking like its time to find some new ones. Then do the ball joints, brakes and inner axle seals all at once.

That's weird! Are they made of plastic or something? lol
 

IceKnight

New member
Nope HD Crown. im looking somewhere else for my next set.
Im cutting the old ones in half when I pull them to make sure they sent the correct items
 
Top Bottom