You are using an out of date browser. It may not display this or other websites correctly.
You should upgrade or use an alternative browser.
You should upgrade or use an alternative browser.
68' M715 AKA "Smokey", 8.1 engine on links, coils and 40's
- Thread starter Rock40
- Start date
Speedy_RCW
Hooked
Awesome job documenting this. And envious of the mill for that shave. I did a 14b with a sawzall and angle grinder. Not so much fun.
Sent from my iPhone using WAYALIFE
Sent from my iPhone using WAYALIFE
A.J.
Active Member
Just finished reading the entire thread so far. Awesome job! Someday I hope to have the time to do a big project like this. Really great job! All the nut serts and simplistic detail. Can’t wait to see the results. Love the old Kaiser Jeeps. Would love to do an old school Power Wagon or Kaiser build.
Sent from my iPhone using WAYALIFE mobile app
Sent from my iPhone using WAYALIFE mobile app
Rock40
Active Member
Well you Gents are too kind, thank you. I'm glad folks on enjoying this. M715's are sort of like unicorns now and if the body on this one didn't look like it had been bounced off trees, hit with rocks and backed into solid objects by some foolish Private 1st Class it likely never would have gone this route. I've got about a years worth of work now to catch up on posting and LOTS more work to go
Rock40
Active Member
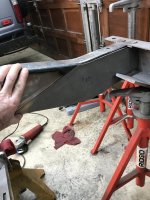
Rear bumper inner reinforcement plate. I want to retain the factory pintle hook, hence the round hole in the center. 1/4" cold roll steel so no need to clean up nasty millscale prior to welding it
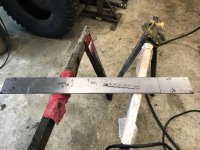
SWAG circle cutter. Simple and super handy
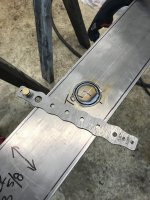
Clamped in place after trimming to fit
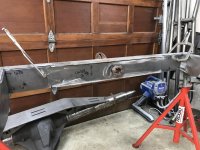
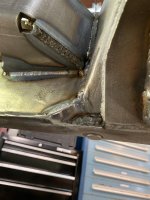
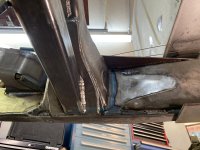
Filling in all the frame holes......because the frame is riddled with them. Along with mounting holes where the rivets went on the old brackets.
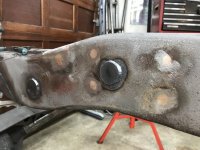
Used silicon bronze in the smaller mounting holes (since none of this is structural) and pre-fabbed tube caps on the larger ones

SWAG circle cutter. Simple and super handy

Clamped in place after trimming to fit

Filling in all the frame holes......because the frame is riddled with them. Along with mounting holes where the rivets went on the old brackets.

Used silicon bronze in the smaller mounting holes (since none of this is structural) and pre-fabbed tube caps on the larger ones

Rock40
Active Member
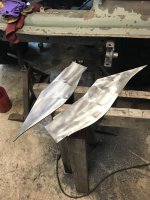
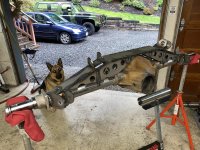
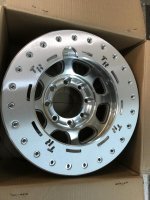
TrailReady's are here :clap2: Almost too nice to want to mount them
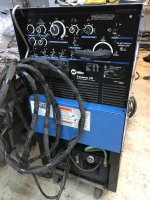
Also swapped out to a different TIG machine. Older Miller Syncrowave but it welds AWESOME compared to the multipurpose machine I was using
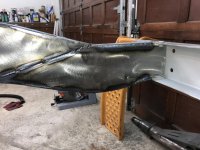
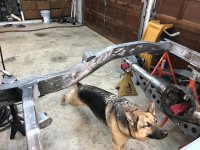
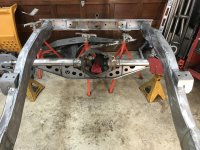
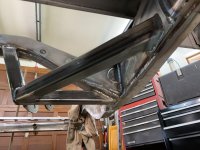
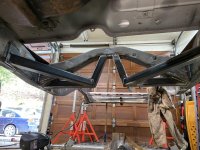
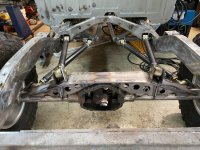
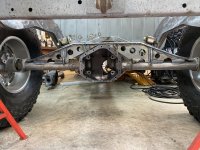
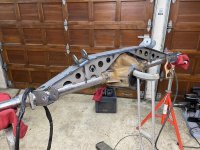
And this was a long time coming. Spent a full 7 hours in the shop welding out the rear axle truss and the link brackets. Slow, but likely worth it. The Syncrowave can sure lay down an awesome weld

Also swapped out to a different TIG machine. Older Miller Syncrowave but it welds AWESOME compared to the multipurpose machine I was using

And this was a long time coming. Spent a full 7 hours in the shop welding out the rear axle truss and the link brackets. Slow, but likely worth it. The Syncrowave can sure lay down an awesome weld

Rock40
Active Member
The following contains weld porn. So shoo your kids out of the room :shock:
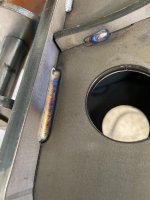
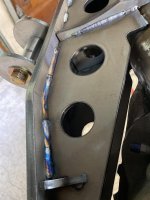
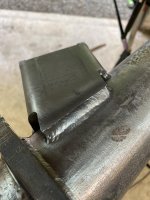
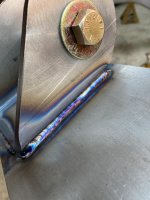
So at least that is done. It’ll still need a few other brackets but those can come later. Truss is a mix of 3/8” and 1/4” plate. Max amperage was 175 and the water cooled torch was such an improvement over air cooled for this much welding
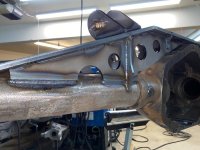


So at least that is done. It’ll still need a few other brackets but those can come later. Truss is a mix of 3/8” and 1/4” plate. Max amperage was 175 and the water cooled torch was such an improvement over air cooled for this much welding

Rock40
Active Member
wjtstudios
Hooked
Those are beautiful welds. Unreal
2015 JKUR AEV JK350
1985 CJ8 Scrambler
2015 JKUR AEV JK350
1985 CJ8 Scrambler
Rock40
Active Member
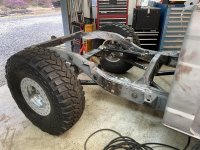
Started welding the rear 4 link bungs in. Got some help to slowly spin the tube while welding so it’s one continuous weld bead. I figure that if that bung separates from the tube at some point, lots of other stuff is going to go well before it
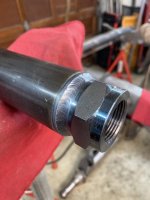
Finished welding out all the rear 4 link bungs today. The lowers with the 3/8” wall tubing were a REAL chore.
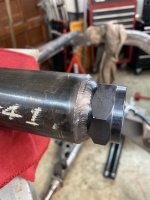


Finished welding out all the rear 4 link bungs today. The lowers with the 3/8” wall tubing were a REAL chore.

Rock40
Active Member
Those are beautiful welds. Unreal
2015 JKUR AEV JK350
1985 CJ8 Scrambler
Thanks! :thumb: The hours and hours of practice on this build have paid off over time.
Andy5160
Hooked
68' M715 AKA "Smokey", 8.1 engine on links, coils and 40's
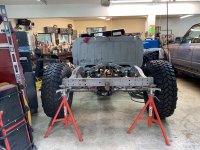
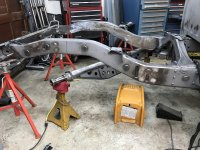
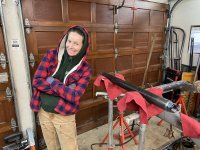
What is the load limit on the crouch jack[emoji23][emoji23][emoji23]
Sent from my iPad using WAYALIFE
TrailReady's are here :clap2: Almost too nice to want to mount them
View attachment 358761
Also swapped out to a different TIG machine. Older Miller Syncrowave but it welds AWESOME compared to the multipurpose machine I was using
View attachment 358762
And this was a long time coming. Spent a full 7 hours in the shop welding out the rear axle truss and the link brackets. Slow, but likely worth it. The Syncrowave can sure lay down an awesome weld
View attachment 358763
What is the load limit on the crouch jack[emoji23][emoji23][emoji23]
Sent from my iPad using WAYALIFE
Rock40
Active Member
What is the load limit on the crouch jack[emoji23][emoji23][emoji23]
Sent from my iPad using WAYALIFE

