Bonedoc's Sting gray JTR build.

WJCO

Meme King
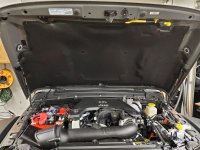
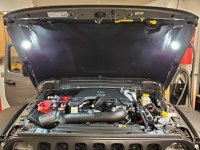
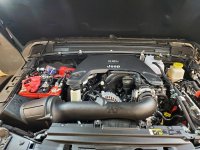
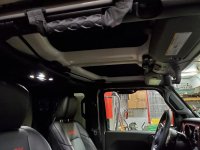
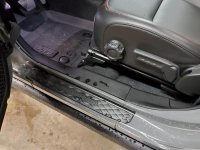
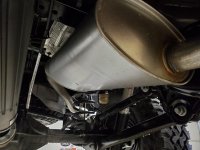
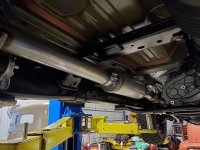
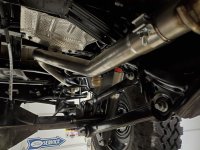
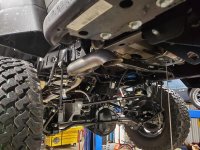
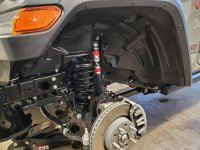
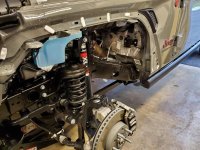
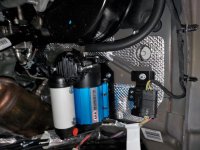
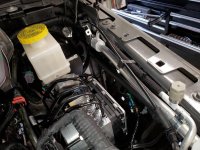
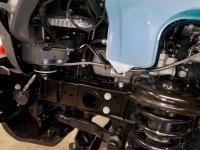
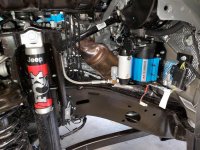
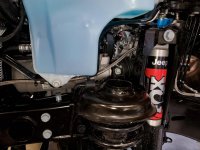
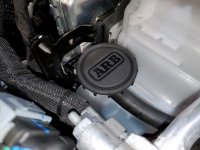
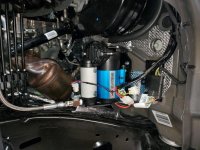
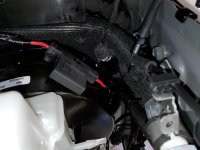
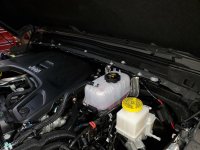
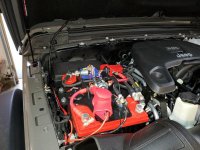
Okay, got my issue with my power steering reservoir sorted out. It was really easy. I was definitely overthinking things when I first posted about it. I took some flat stock and bent it into a reversed 'Z' shape. Drilled holes in the ends and used clip nuts and 1/4 -20 flange bolts. I used an empty mounting point on top of the motor. This allowed me to move it up and to the right a few inches. It is also adjustable and you can swing the bracket and or the reservoir to accommodate your situation. Then once the bolts are locked into place it is nice and solid. Got a longer piece of 9.5mm - 3/8" power steering hose and replaced the factory one completely. The hardest part was removing the reservoir and the hose without spilling or dripping any fluid in my brand new engine compartment....I know...but trying to keep it looking clean for a little bit...LOL.

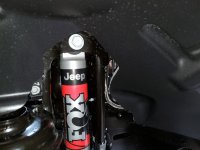
Here are some pics if anyone else runs into this.


View attachment 340495


Nice work. Glad you got that figured out.
 

wjtstudios

Hooked
Great job working thru that. It’s those little unexpected things that slow down the builds.


2015 JKUR AEV JK350
1985 CJ8 Scrambler
 

WJCO

Meme King
Thank you, and thank you for straightening my pics. If you could please PM me if there is something in particular I'm doing wrong when I upload them. Thanks again.

No problem. I don't know what causes it. Someone said previously they think it's too large of a file on certain devices :idontknow:
 

Brute

Hooked
No problem. I don't know what causes it. Someone said previously they think it's too large of a file on certain devices :idontknow:

I noticed that when I take pics from my i6 sideways, they post correctly...when I take the same pic with the phone vertically, they post sideways...
 

bonedoc

Member
Got a few more small things done today. Installed a set of KC Hi light underhood led cyclone lights. They work really nice, hooked them into my aux switches and run them off battery so I can switch them on without the Jeep on. Also installed set of Hothead Headliners, Mopar sill guards, and Mopar grab handles. Some minor things but fun nonetheless. Hopefully will get my MBRP exhaust and/or ARB onboard air and ACM installed tomorrow.
 

Attachments

  • Gladiator34.jpg
    Gladiator34.jpg
    106 KB · Views: 201
  • Gladiator35.jpg
    Gladiator35.jpg
    113 KB · Views: 199
  • Gladiator36.jpg
    Gladiator36.jpg
    125.2 KB · Views: 201
  • Gladiator37.jpg
    Gladiator37.jpg
    77.1 KB · Views: 199
  • Gladiator38.jpg
    Gladiator38.jpg
    68.1 KB · Views: 200
  • Gladiator39.jpg
    Gladiator39.jpg
    97.3 KB · Views: 199
  • Gladiator40.jpg
    Gladiator40.jpg
    114.7 KB · Views: 197
  • Gladiator41.jpg
    Gladiator41.jpg
    75.9 KB · Views: 199

bonedoc

Member
I noticed that when I take pics from my i6 sideways, they post correctly...when I take the same pic with the phone vertically, they post sideways...

I took your advice, took all my pics with my camera sideways and all good. Thanks for the suggestion
 

bonedoc

Member
Installed my MBRP Pro series exhaust today. Fit perfect, sounds great. This exhaust is about half the weight of the factory system and it fits much higher and tighter into the frame.
 

Attachments

  • Gladiator42.jpg
    Gladiator42.jpg
    95 KB · Views: 189
  • Gladiator43.jpg
    Gladiator43.jpg
    79.2 KB · Views: 192
  • Gladiator44.jpg
    Gladiator44.jpg
    91.5 KB · Views: 191
  • Gladiator45.jpg
    Gladiator45.jpg
    98 KB · Views: 191
  • Gladiator46.jpg
    Gladiator46.jpg
    124.8 KB · Views: 191

bonedoc

Member
Got my onboard air installed today. Using Eddie's video as a guide I used ARB's CKMA12 high output compressor with the ACM. I also bought all the accessories he recommended as well. Worked out really nice. It is a compact unit but has plenty of power to air up tires. Not hard at all to install. I was really nervous to pull off the fender but it went well. I would highly recommend purchasing some spare clips ahead of time. I bought a bag of 25 of them. Glad I did as several did snap. I installed my compressor basically the same way that Eddie did. Only difference being I did my compressor airfilter remotely and located up higher just in front of the windshield washer reservoir.
 

Attachments

  • compressor1.jpg
    compressor1.jpg
    94.2 KB · Views: 208
  • compressor2.jpg
    compressor2.jpg
    126.3 KB · Views: 209
  • compressor3.jpg
    compressor3.jpg
    99.1 KB · Views: 209
  • compressor4.jpg
    compressor4.jpg
    118.9 KB · Views: 208
  • compressor5.jpg
    compressor5.jpg
    92.7 KB · Views: 206
  • compressor6.jpg
    compressor6.jpg
    125.3 KB · Views: 206
  • compressor8.jpg
    compressor8.jpg
    93.1 KB · Views: 194
  • compressor9.jpg
    compressor9.jpg
    102.6 KB · Views: 194
  • compressor10.jpg
    compressor10.jpg
    80.1 KB · Views: 181

bonedoc

Member
Ran the electrical up the driver's fender tight to the firewall. Attached the relay to the grounding nut on fender support. Then ran wires along the cowl and around to the battery and auxillary switch wires. Worked out good. Had to extend the main power and ground wires about a foot to reach the buss bars on my battery set up. Fortunately I had some 10ga wire to match and soldered the connections and shrink wrapped them. Unfortunately...I only had red wire...hence why my black extension is wrapped in electrical tape. Tested everything out before putting back together. All worked as it should , no air leaks. Awesome mount!! Thanks again Eddie!!
 

Attachments

  • compressor7.jpg
    compressor7.jpg
    113.1 KB · Views: 181
  • compressor11.jpg
    compressor11.jpg
    82.4 KB · Views: 182
  • compressor12.jpg
    compressor12.jpg
    97.4 KB · Views: 182
  • compressor13.jpg
    compressor13.jpg
    117.7 KB · Views: 182
  • compressor14.jpg
    compressor14.jpg
    80 KB · Views: 182
  • compressor15.jpg
    compressor15.jpg
    64.5 KB · Views: 181

wjtstudios

Hooked
That is a great location for that, Eddie did a awesome job on that mount. Did you run the intake vent up high?


2015 JKUR AEV JK350
1985 CJ8 Scrambler
 

wayoflife

Administrator
Staff member
Ran the electrical up the driver's fender tight to the firewall. Attached the relay to the grounding nut on fender support. Then ran wires along the cowl and around to the battery and auxillary switch wires. Worked out good. Had to extend the main power and ground wires about a foot to reach the buss bars on my battery set up. Fortunately I had some 10ga wire to match and soldered the connections and shrink wrapped them. Unfortunately...I only had red wire...hence why my black extension is wrapped in electrical tape. Tested everything out before putting back together. All worked as it should , no air leaks. Awesome mount!! Thanks again Eddie!!

Everything you've done looks awesome! So glad you like the ACM :thumb:
 

bonedoc

Member
That is a great location for that, Eddie did a awesome job on that mount. Did you run the intake vent up high?


2015 JKUR AEV JK350
1985 CJ8 Scrambler

The intake for the compressor is up just in front of the washer fluid reservoir. Pretty much as high as I could go without going with a snorkel.
There is a bolt sticking through and I was able to bolt the air filter bracket to that bolt.
 
Top Bottom