You are using an out of date browser. It may not display this or other websites correctly.
You should upgrade or use an alternative browser.
You should upgrade or use an alternative browser.
Rear bumper removal
- Thread starter Jimmypaget
- Start date
Jimmypaget
Member
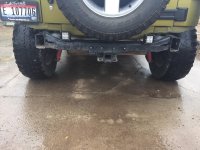
Now I'm thinking about pulling my shittybilt bumper off.
Do it! Join the club!
Napalm
Caught the Bug
Thanks! I gotta get me a shackle kit! ASAP! Any chopping required for that or the fascia?
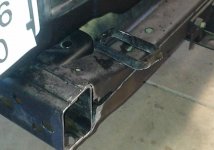
Nothing is required but it is reccomended that you take a little off(I took off less than half an inch) of the ends of the frame to help the D ring mounts sit flush. Mine don't sit perfectly flush, but it's close enough for me.
Sent from my iPhone using WAYALIFE mobile app
Kyle7R
New member
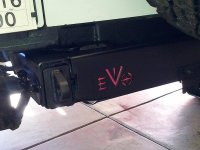
That reflector tape is a nice touch. I did the same thing to my hitch basket, and somebody still hit the damn thing..
x2, I didn't trim mine completely flush for my mounts and fascia, but taking a little bit off made a world of difference.Nothing is required but it is reccomended that you take a little off(I took off less than half an inch) of the ends of the frame to help the D ring mounts sit flush. Mine don't sit perfectly flush, but it's close enough for me.
Sent from my iPhone using WAYALIFE mobile app
Sent from my SAMSUNG-SM-G890A using WAYALIFE mobile app
NevadaZielmeister
Caught the Bug
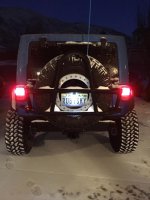
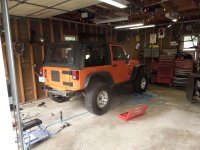
Okay, I'll play, here is mine. But I give credit to Eddie as Rubicat gave me the inspiration.
Sent from my iPhone using WAYALIFE mobile app
benatc1
Hooked
here is mine with nothing, like Eddie said. I will be adding fascia/drings soon but don't mind how it is now.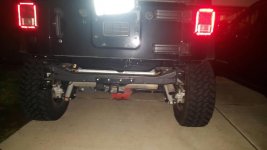 thought I had more pics but will grab a few more in the am!
Sent from my SM-G928V using WAYALIFE mobile app
 thought I had more pics but will grab a few more in the am!
Sent from my SM-G928V using WAYALIFE mobile app
WJCO
Meme King
Jimmypaget
Member
Damn those look good! If you don't cut them first, and install them, can you pull them out and cut it later?
Sent from my iPhone using WAYALIFE mobile app
Sent from my iPhone using WAYALIFE mobile app
WJCO
Meme King
Damn those look good! If you don't cut them first, and install them, can you pull them out and cut it later?
Sent from my iPhone using WAYALIFE mobile app
You could, but one of ours was a tight fit and we had to hammer it in. I wouldn't want to go to the trouble to take it out again.
Jimmypaget
Member
LasVegasJK
New member
I have one. And any other tools needed. Bring the jeep and the parts and we'll get it done.
Sent from my iPhone using WAYALIFE mobile app
Kyle7R
New member
Same here. It was a snug fit on the passenger side for me.You could, but one of ours was a tight fit and we had to hammer it in. I wouldn't want to go to the trouble to take it out again.
Sent from my SAMSUNG-SM-G890A using WAYALIFE mobile app
Not my cup of tea, but I got an email from ACE that should be considered.
https://www.aceengineeringandfab.com/mobile/ACE-JK-Hammertown-Rear-Armor_p_229.html
Sent from my LG-D950 using WAYALIFE mobile app
https://www.aceengineeringandfab.com/mobile/ACE-JK-Hammertown-Rear-Armor_p_229.html
Sent from my LG-D950 using WAYALIFE mobile app
WJCO
Meme King
Not my cup of tea, but I got an email from ACE that should be considered.
https://www.aceengineeringandfab.com/mobile/ACE-JK-Hammertown-Rear-Armor_p_229.html
Sent from my LG-D950 using WAYALIFE mobile app
Welcome to Wayalife? HUH?
Not my cup of tea, but I got an email from ACE that should be considered.
https://www.aceengineeringandfab.com/mobile/ACE-JK-Hammertown-Rear-Armor_p_229.html
Sent from my LG-D950 using WAYALIFE mobile app
Ummm, welcome to WAYALIFE :rolleyes2:
jkris
New member
Mike_JK_Houston_711
New member
an a bad job, have to open the slits in the frame to get the stop nuts in but no biggieView attachment 243204
Me too...I've had them on for months now and I still haven't opened them up to get that second bolt on. I won't tell if you don't... :cheesy:
mudmobeeler
Caught the Bug
not a bad job, have to open the slits in the frame to get the stop nuts in but no biggieView attachment 243204
Me too...I've had them on for months now and I still haven't opened them up to get that second bolt on. I won't tell if you don't... :cheesy:
Something to check on your jeep, mine was this way. On one side the flag nut was really close about going in. A slight love tap from a hammer and it went in through the slot without having to open it up. Other side wasn't even close, however if you went from the other side of the crossmember (muffler side) then the holes were reversed. Now the side that wasn't close to fitting just needed a love tap on the muffler side and it went in. So I was able to get one flag nut in on the side towards the rear of the jeep and able to get the other flag nut in on the side that was towards the muffler with no cutting.
Hope that makes since.

