Gobicon

aTX427

New member
Benito, your project is coming along nicely. Great work on the high mount rear axle mounts. Question on the front - If I remember correctly, the Evo upper control arms are angled. Is that do clear the frame during articulation or the tires when turning? If the latter, would you clear if they were straight?
 

Benito

Caught the Bug
Benito, your project is coming along nicely. Great work on the high mount rear axle mounts. Question on the front - If I remember correctly, the Evo upper control arms are angled. Is that do clear the frame during articulation or the tires when turning? If the latter, would you clear if they were straight?

IMG_4367.jpg

I am pretty sure they are angled to clear the frame when articulating. At ride height it looks like a straight piece would work once you start articulating it will probably hit the frame

Edit: for clarification, the upper is not hitting the frame as it appears in the picture, it is just the angle that the picture was taken in.
 
Last edited:

aTX427

New member
Benito;950758 I am pretty sure they are angled to clear the frame when articulating. At ride height it looks like a straight piece would work once you start articulating it will probably hit the frame Edit: for clarification said:
Thank you :beer:
 

Benito

Caught the Bug
Been a while since I have updated. Before the Texas Exodus run and before I worked on the rotopax I had a lot of stuff to do after the long arm install

Evo Rock Sliders ✔️

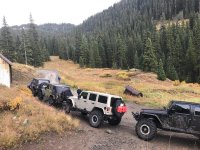
you can kind of see them in this picture

IMG_4381.jpg

UHF/VHF & CB Radio✔️

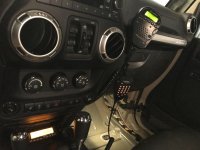
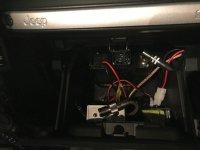
I installed the 50w unit from rugged radios and installed the Cobra 75 from the old Jeep inside the glove box. Mounted the CB antenna in the back on the mount that is available on the Evo tire carrier and I mounted the UHF/VHF antenna on the front bumper on the fair lead light mount, has some protection provided by the stinger, not the highest location but it was good enough to hear people back at camp 10-15 miles away.

IMG_4510.jpg

IMG_4507.jpg

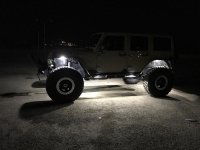
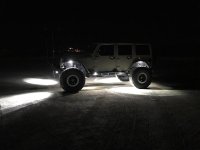
I also installed rock lights, I wired in the LUX lights that I had on the old Jeep and I added in some Rigid lights to the bottom and front bumper

LUX lights

IMG_4371.jpg

LUX lights and Rigid

IMG_4372.jpg

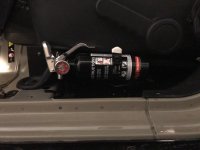
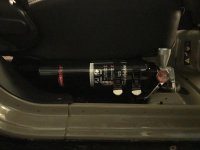
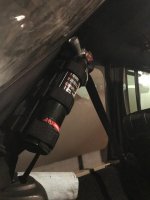
I also installed fire extinguishers. I originally planned on installing two 2.5 lbs H3R Halguard extinguishers on the drivers side and passenger side seat. I found that the drivers side one stuck out to far forward so I swapped it for a 1.5lb H3R Halguard and moved the 2.5lb to the back rollbar. This is one of those additions that you really wish you never have to use.


Drivers side

IMG_4512.jpg

Passenger side

IMG_4513.jpg

Rear roll bar

IMG_4514.jpg

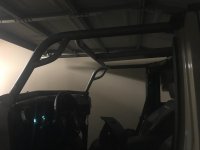
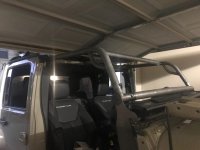
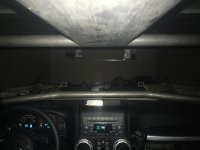
This leads me to today, I started ripping out the interior to install a Poison Spyder Trail Cage. After getting to see some Rock Hard Cages and an EVO cage, the Poison Spyder cage still appeals more to me, I can’t get used to squareness of the Evo cage, guess I like the tube look, and it didn’t really appear to provide that much more visibility, maybe only when the doors are off and you need to see around the A pillar but the dash bar didn’t seem any lower than what I had the PS cage in the green Jeep, nearly touching the dash, maybe 1/8”from the dash. The rock hard cage looks too bulky to me, the collars are massive and even though I saw one of the rock hard cages with the dash bar as low as it could possibly be, when it bends upwards to tie into the A pillar seemed a bit distracting to me. From what I heard about installs and experience they all seem to be a pain in the ass to install, not just the Poison Spyder, and never quite understood the “it makes to much noise” claim, granted I did tie in my windshield and will do so again on this install, I am currently debating if I should cut off the floor tie ins or leave them. Neither of the other two big brand cages have floor tie ins on the A pillar so is it absolutely necessary for the Poison Spyder cage to have them? Hopefully tomorrow I will have the cage installed
 

Exodus 4x4

New member
Been a while since I have updated. Before the Texas Exodus run and before I worked on the rotopax I had a lot of stuff to do after the long arm install

Evo Rock Sliders ✔️

you can kind of see them in this picture

View attachment 280444

UHF/VHF & CB Radio✔️

I installed the 50w unit from rugged radios and installed the Cobra 75 from the old Jeep inside the glove box. Mounted the CB antenna in the back on the mount that is available on the Evo tire carrier and I mounted the UHF/VHF antenna on the front bumper on the fair lead light mount, has some protection provided by the stinger, not the highest location but it was good enough to hear people back at camp 10-15 miles away.

View attachment 280446

View attachment 280447

I also installed rock lights, I wired in the LUX lights that I had on the old Jeep and I added in some Rigid lights to the bottom and front bumper

LUX lights

View attachment 280448

LUX lights and Rigid

View attachment 280449

I also installed fire extinguishers. I originally planned on installing two 2.5 lbs H3R Halguard extinguishers on the drivers side and passenger side seat. I found that the drivers side one stuck out to far forward so I swapped it for a 1.5lb H3R Halguard and moved the 2.5lb to the back rollbar. This is one of those additions that you really wish you never have to use.


Drivers side

View attachment 280450

Passenger side

View attachment 280451

Rear roll bar

View attachment 280452

This leads me to today, I started ripping out the interior to install a Poison Spyder Trail Cage. After getting to see some Rock Hard Cages and an EVO cage, the Poison Spyder cage still appeals more to me, I can’t get used to squareness of the Evo cage, guess I like the tube look, and it didn’t really appear to provide that much more visibility, maybe only when the doors are off and you need to see around the A pillar but the dash bar didn’t seem any lower than what I had the PS cage in the green Jeep, nearly touching the dash, maybe 1/8”from the dash. The rock hard cage looks too bulky to me, the collars are massive and even though I saw one of the rock hard cages with the dash bar as low as it could possibly be, when it bends upwards to tie into the A pillar seemed a bit distracting to me. From what I heard about installs and experience they all seem to be a pain in the ass to install, not just the Poison Spyder, and never quite understood the “it makes to much noise” claim, granted I did tie in my windshield and will do so again on this install, I am currently debating if I should cut off the floor tie ins or leave them. Neither of the other two big brand cages have floor tie ins on the A pillar so is it absolutely necessary for the Poison Spyder cage to have them? Hopefully tomorrow I will have the cage installed

Awesome man. Good luck with the install and can’t wait to see it in a couple of weeks.


Sent from my iPhone using WAYALIFE mobile app
 

Benito

Caught the Bug
Awesome man. Good luck with the install and can’t wait to see it in a couple of weeks.

Hopefully I’ll have it all done, I haven’t stopped working since I got back. I am so ready to get to use my Jeep for what it’s built to do. barely got a tease on Top of the World.

Which Lux kit do you have? 8 or 12?

12 pack w/o the install kits. Their customer service is great, however they manufacture in batches and I had to wait around three weeks for them to come in. When I originally installed them on the green Jeep found one bad light that would flicker and got a replacement within a couple of days, after installing them a second time I found two more bad ones, one just didn’t turn on and another flickers spontaneously, I requested replacements before the exodus and got a call back from them last week, they let me know that they were currently waiting for the LEDs to arrive to make another batch. Whoever I talked to also let me know that their previous batch had contact patches on the circuit boards that were not finished properly so the solder wasn’t sticking causing some of the resistors to pull off as the resin cured.

Holy hell! Jeep looks amazing. Good work.

Thanks
 

Jackal01

New member
Micro max, max or monster? I'm looking at the 12 Max (spod specific) kit in white. Website says 30 day wait.

Sounds like they're on top of their customer service game. Hopefully it's all been resolved.
 

Benito

Caught the Bug
Micro max, max or monster? I'm looking at the 12 Max (spod specific) kit in white. Website says 30 day wait.

Sounds like they're on top of their customer service game. Hopefully it's all been resolved.

The Max, the magnetic mounting makes them well worth it. I ran 14g pair of wires down each side of the chasis and wired the lights to it, which allowed me to leave an extra foot of wire to be able to move the lights if needed.
 

Benito

Caught the Bug
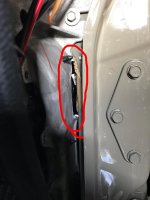
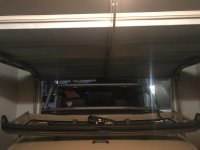
Got the front part of the cage installed. Going to have to borrow the angle drill from work again to drill the holes in the floor board. Having previously installed one of these I kind of know what to do and not do and I am not following the instructions step by step based off of previous experience. I have decided to try to install the cage completely first before I drill the holes in the door jam for the a pillar and floor board. I also don’t plan on using the spacers they provide to place under the A pillar foot piece and cut the foot to fit the floor board. On the previous install I beat. The floor pan until it was flat where the cage mounted. I also trimmed the dash frame on the passenger side as I had for the previous install, and it was needed for this one as well, these were all things not mentioned in the instructions but it is coming along nicely.

Some pictures:

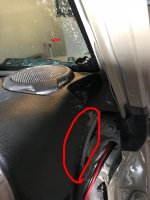
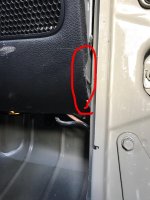
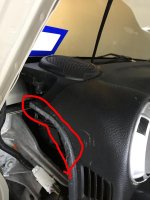
Had to trim some of the plastic on the dash to allow the A pillar to fit into the dash on the side

IMG_4516.jpg

IMG_4518.jpg

IMG_4524.jpg

IMG_4525.jpg

This is where you have to trim the dash frame, when doing this you have to remove the glove box and speaker so that you can pull some wires away from that area, or you will cut one or two... I did that on the last Jeep

IMG_4517.jpg

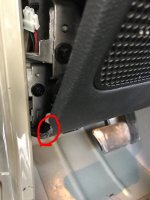
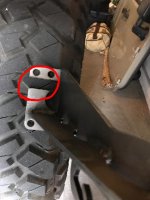
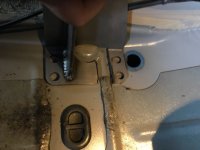
I cut a piece off of the floor tie in so that it would fit the floor board. PS supplies some spacers that you are supposed to place under neath so that it bridges over the hump, however this causes the dash bar to be too high for my taste. On the last Jeep I beat in the floor board until it was flat.

IMG_4519.jpg

IMG_4527.JPG

This is how where I got up to today.

IMG_4528.jpg

IMG_4529.jpg

IMG_4530.jpg

IMG_4541.jpg

Tomorrow I plan on drilling the holes in the floor board, and bolting the feet down so that it pulls the dash bar even closer to the dash and drilling the holes on the door jams. I marked the A pillar side plates where the center of the holes are so that I can drill them exactly where they need to be, these are some of the first steps in the instructions, however they tell you to drill based off of measurements and a notch in the door jam, that resulted in me not liking how high the dash bar was and elongating the holes to be able to lower it. From the previous install I also learned to run a tap with cutting oil through all the connection joints, I will say these were some of the dirtiest threads I have seen. I believe this is probably one of the fasted parts of this whole install, the hard part is the details, trimming all the plastics to give a good finish takes up a lot of time.
 
Top Bottom