You are using an out of date browser. It may not display this or other websites correctly.
You should upgrade or use an alternative browser.
You should upgrade or use an alternative browser.
Lost Yeti's Build Thread
- Thread starter Kenny-g
- Start date
Kenny-g
Caught the Bug
Just did this today:
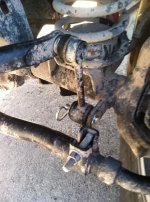
Homemade disco's I made with the help of this link:
http://4x4xplor.com/homediscos.html
The drivers side is very tight but the passenger side is really loose. I'm hoping after a few weeks of driving it'll settle itself out and equalize on both sides because as of now it's a bit of a PITA to put them back on. We shall see Thanksgiving weekend after a trip to Hidden Falls Adventure Park in Marble Falls, TX.
I'm planning on getting my fenders trimmed and back on I just have to find a place to trim them at.
Kenny-g
Caught the Bug
I FINALLY chopped my fenders  I'm pretty proud of them
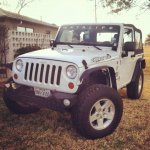
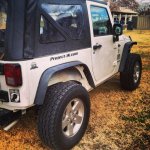
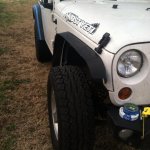
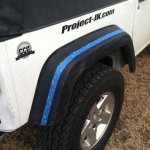
I have MetalCloak Aluminum inner fenders but apparently they're made to be used with their front fender flares which I don't have which mean I'd have to drill holes in the fender. NOPE! Not when I wanted to keep the stockers. I'm going to save and get their front fenders and then later the rears. Sucks but oh well.
I have another set of knockoff Dually's coming and I'm going to tool around with a set of OEM fog lights my buddy is giving me. Theoretically, with some minor trimming, you could get a set of Dually's to work in the part of the fog light that get bolted onto bumpers. You'll see more of that come January lol
I bought a set of Rubi Rails finally! I'll be installing them on Monday night before I leave for Wyoming Tuesday morning (flying not driving )
)
Christmas should bring some more Jeep gifts from my parents and brother so I'm looking forward to that.
I have an excel spreadsheet of what I want to buy and I'm trying to keep it as cheap as possible. So far I think I'm doing really good
I'm saving for an sPOD and rear bumper stuff (the new EVO Fascia stuff :thumb: ). I'm hoping to get more LEDs too
*Edit: oh and I cleaned her real good after this. I've been neglecting her lately so I'ma try to be better about keeping her clean when not off roading haha


I have MetalCloak Aluminum inner fenders but apparently they're made to be used with their front fender flares which I don't have which mean I'd have to drill holes in the fender. NOPE! Not when I wanted to keep the stockers. I'm going to save and get their front fenders and then later the rears. Sucks but oh well.
I have another set of knockoff Dually's coming and I'm going to tool around with a set of OEM fog lights my buddy is giving me. Theoretically, with some minor trimming, you could get a set of Dually's to work in the part of the fog light that get bolted onto bumpers. You'll see more of that come January lol
I bought a set of Rubi Rails finally! I'll be installing them on Monday night before I leave for Wyoming Tuesday morning (flying not driving
Christmas should bring some more Jeep gifts from my parents and brother so I'm looking forward to that.
I have an excel spreadsheet of what I want to buy and I'm trying to keep it as cheap as possible. So far I think I'm doing really good
I'm saving for an sPOD and rear bumper stuff (the new EVO Fascia stuff :thumb: ). I'm hoping to get more LEDs too
*Edit: oh and I cleaned her real good after this. I've been neglecting her lately so I'ma try to be better about keeping her clean when not off roading haha
LittleD-Tj
New member
Looks a lot better with the cut fenders than the no fenders.
KPM171
New member
Very cool DIY. :thumb: Try a rubber mallet to make 'encouraging' the sway bar links back in their place easier. I always have one with me when I wheel.Just did this today:
View attachment 56891
Homemade disco's I made with the help of this link:
http://4x4xplor.com/homediscos.html
The drivers side is very tight but the passenger side is really loose. I'm hoping after a few weeks of driving it'll settle itself out and equalize on both sides because as of now it's a bit of a PITA to put them back on. We shall see Thanksgiving weekend after a trip to Hidden Falls Adventure Park in Marble Falls, TX.
I'm planning on getting my fenders trimmed and back on I just have to find a place to trim them at.
Last edited:
Kenny-g
Caught the Bug
So here is my first ever edited video  It's not too shabby in my opinion lol it's not the most interesting wheeling you'll ever see but it's something to help me ease on into this video editing thing lol I have to learn how to properly use my GoPro Hero3+ somehow lol it looks best in 1080P and in the larger screen and even better in full screen
https://www.youtube.com/watch?v=wkp2G-p9weI
That was teh first of three failed hill climb attempts ... I really needed a good spotter to help. I was picking good lines but kept hittin loose dirt or kept getting caught on/in between big limestone rocks and ledges. I'll get em next time!
I'll be making more videos with the rest of the footage I have from this trip but they'll take longer because they require more editing to keep them from being long and boring of me just putting around from obstacle to obstacle lol so for now, please enjoy this and keep an eye out for more
Angry Aussie
New member
Well done man! Can't wait to see more. Your gonna have to come show me how to edit video.
Kenny-g
Caught the Bug
Well done man! Can't wait to see more. Your gonna have to come show me how to edit video.
With YouTubes free video editor its easy but you can't do a whole lot. I need to get some form of dedicated software to do it but for now, just to start learning, I'm using whats free haha GoPro has free software but I didn't wanna download anything at the time but after finding out you can't speed up the video any via the YouTube editor, I might go ahead and download it tonight.
Thanks for the compliment man.
Kenny-g
Caught the Bug
I got my new LED reverse lights in yesterday so I installed them at night  Here's the link to the lights: http://www.ebay.com/itm/181125910961?ssPageName=STRK:MEWNX:IT&_trksid=p3984.m1497.l2649
And heres the pictures...at first I installed them backwards so they didn't work (dumb on my part) but now they're working great and are bright as hell! I like them a lot. I still want to put either a 20" single row light bar back there or some single row driving lights (James knows what I'm talking about).
View attachment LED Reverse Lights.bmp
View attachment LED Reverse Light Install.bmp
View attachment LED Reverse Lights Lit.bmp
Atch
New member
Installed the Daystar Hood Wranglers tonight...it was such a PITA with limited tools but I was able to finally get it done. I hope they stretch out a little bit because they're ridiculously tight right now lol No pics sorry they're nothing special anyway haha
They will stretch out a little bit over time. All you need for tools are two vice grips and two screwdrivers.
Kenny-g
Caught the Bug
They will stretch out a little bit over time. All you need for tools are two vice grips and two screwdrivers.
Good to hear and I had several screw drivers but no vice grips so I had to man handle the crap out of the stock clip things to get them off.
Kenny-g
Caught the Bug
I got an sPOD and installed it. Can't wait to get everything wired up to it (I still need to get a 20" light bar for the front, another set of knockoff pods for the rear, LED rock lights, and a 12V outlet for the rear). I ran into a Marine Jeeper on base a few weeks ago and invited him to wheel with us two Saturdays ago with a huge ass group of Jeeps locally and in return he gave me some Rugged Ridge d-ring mounts for free. I also installed a set of pods as replacement fog lights a few weeks ago that I made a write up for on here but I guess I didn't put that in here.
Pics of all the above lol:
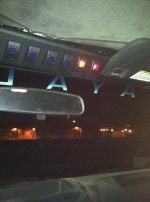
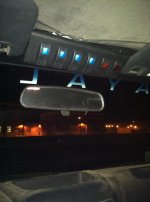
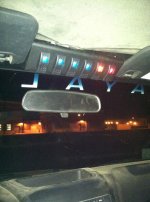
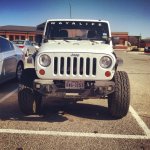
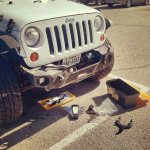
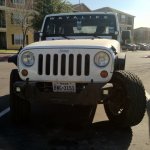
Pics of all the above lol:


KPM171
New member
Those look great! Are you sure about that eBay link tho? According to that page, these LEDs aren't compatible with 2013 Wranglers.I got my new LED reverse lights in yesterday so I installed them at nightHere's the link to the lights: http://www.ebay.com/itm/181125910961?ssPageName=STRK:MEWNX:IT&_trksid=p3984.m1497.l2649
View attachment 63614View attachment 63612View attachment 63613
Kenny-g
Caught the Bug
Those look great! Are you sure about that eBay link tho? According to that page, these LEDs aren't compatible with 2013 Wranglers.
I might've accidentally put a wrong link. Mine definitely said it works with the '13s
*Edit: idk why it says it doesn't work but it totally does. Thats the product I bought and they obviously work.
Last edited:
Kenny-g
Caught the Bug
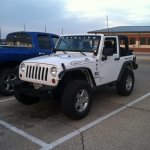
Finally topless! I love living in Texas sometimes lol the weather is iffy but worth the top down weather in February haha
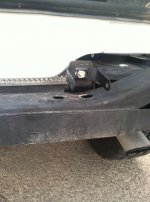
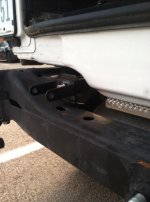
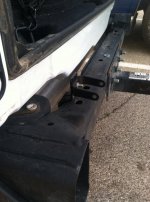
I realized that when i removed my stock rear bumper I kept the little metal tabs on it so I pulled them to use as mounts for my new single row LED pods. I'm just waiting on them to come in so i can pick them up
MTG
Caught the Bug
View attachment 70051
Finally topless! I love living in Texas sometimes lol the weather is iffy but worth the top down weather in February haha
I realized that when i removed my stock rear bumper I kept the little metal tabs on it so I pulled them to use as mounts for my new single row LED pods. I'm just waiting on them to come in so i can pick them upI'm hoping I'll get them tomorrow. The following pics are of the mounts. I won't be using those exact U shaped 'hangers' because they'll be too wide for the lights but I just wanted to get a general idea of how the lights will sit. I'm very happy with it
View attachment 70052
View attachment 70053
View attachment 70054
Looks good! How's the humidity there?

